1:19 PM

Tomato Soup with Cheese Crackers

Tomato soup can be pretty simple.  Open a can of your favorite brand, pour in some milk, heat and serve.  The real challenge is making cheese crackers from scratch.  The two kind of crackers that are my kids favorite are goldfish and cheezits.  I was up to the challenge of making them this afternoon and found a great recipe on a blog called "Making New with the not so New".  I can't wait to experiment with this one and see what kinds of creations come out of it.  Of course I didn't have any fishy cookie cutters, so I decided to make my own like they did on the web site I visited.  I used the can that my tomato soup came in.  The ridges around it made it easy to get an even cut.


Cut the can in half first, and then cut an even strip around the can.


I made it into a fish shape as best I could.  I didn't use the whole strip because I tried to make it as little as possible.  I used hot glue to join the ends.  It doesn't look to pretty, but it got the job done.


This is what you need for the cracker dough:  1/2 cup white flour, 1/2 cup wheat flour, 4 tablespoons cold salted butter, 8oz shredded cheese (I used cheddar), 1/2 teaspoon pepper.

Preheat oven to 350.

Put all ingredients in a food processor and combine.  If it doesn't form into a ball (mine did not) add enough water to it so that it looks like the picture below. (I added approx. 1/4 cup water)


Flour your counter and roll the dough out until it is very thin.  It should not be more than 1/8" thick.  I broke the dough off in smaller pieces to make it easier.  If you make them thin enough, you should be able to fill approximately 4 cookie sheets.


Press your cookie cutters into the dough.  I found that I did have some other very small cookie cutters (a mitten and a snowflake), but making my own was fun!


Slide the shapes onto a cookie sheet.  I used parchment paper, but you don't have to.  I just find it easier to slide the paper off and let the crackers cool on the paper while I re-use the cookie sheet after I pull them out of the oven.


Put them in the oven for 15 minutes.  They should be golden brown when they are done.

Eat them by themselves, or put them in your soup!

When I make these again I am going to use sharper cheeses such as Asiago cheese and sharp white cheddar.  I also am going to use only wheat flour instead of any white.  They are very good the way they are, but it's always fun to try some new ways, don't you agree?

8:41 AM

Chicken Packets with Caesar Salad

My mom introduced chicken packets to our family growing up and I don't think she ever had any complaints when she made it.  They are good warm or cold, so the leftovers can be put into lunches.  They can also be assembled ahead of time and baked later.  Sometimes I make a traditional roll dough instead of buying store bought cresent rolls, but if your looking for something quick and easy, the store bought is the way to go.  Also, I have substituted different meats and added other cheeses to use what I have on hand and have found good success.  This recipe makes 8 packets.

The Caesar salad dressing is an old recipe that my husbands grandmother used to make.  I never got to taste it made by her (she died before I met my husband), but it is served at many family gatherings.  Most family members omit the egg that she used to include.  I get a little nervous about eating raw eggs, so I leave it out too.

For the packets you will need:  2 cups cooked, chopped chicken, 3 ounces of cream cheese-softened, 1 tablespoon chopped onion or chives, 2 tablespoons milk, salt to taste, 1/2 cup crushed crouton crumbs, 2 packages refrigerated crescent rolls, 1/4 cup olive oil or melted butter.

For the salad dressing you will need:  1/4 cup canola oil, 1/4 cup lemon juice, a couple splashes of Worcestershire sauce, approximately 1/2 cup of parmesan cheese (make it as thick as you like), 4-5 cloves of crushed garlic, salt and pepper to taste, and croutons if you desire.

For the salad dressing, mix all the above ingredients together and put into the refrigerator to thicken while you assemble the packets.

Preheat your oven to 350, or whatever the package directions on your crescent rolls calls for.

Mix together meat, cheese, onion, milk, and salt.


Join two crescent rolls together by pinching the seams together to form a rectangle.  Do this until you have used up all the crescent rolls.  You will have 8 rectangles.


Slightly roll out each rectangle to flatten them out.


Divide the meat mixture evenly unto each of the rectangles by placing a mound in the center of each.


Fold the corners up and seal up the packet.


Place the packets on a cookie sheet.  I like to use parchment paper, but it is not necessary.  Brush each packet with olive oil.


Top each packet with crushed croutons. Bake for 20 minutes.


While the chicken packets are in the oven, assemble the salad.  To do this, pour the dressing over a head of Romaine lettuce and croutons.  My family may be odd, but we like the dressing to be soaked into the croutons, so we add the croutons first.


After your packets are golden brown, serve and enjoy!

8:47 AM

Pizza From Scratch

Pizza is my go to meal, just ask anyone in my family!  With my Artisan dough continually in my refrigerator, it is a 20 minute start to finish family favorite meal.  There is a video of how to make the Artisan dough done January 5 on this blog.  I am going to show you the common pepperoni pizza, but the skies the limit as to the toppings.  I believe a pizza peel and baking stone are a must in making a good pizza. Both of these things can be bought at Bed Bath and Beyond (a good way to use your 20% off coupon!) The key to a good crust is cooking it at a very high temperature for a short time.  Most ovens go up to 500 before the broil setting, this is what I use and I have had good success.  The baking stone is put into the oven when it is preheating so that you are placing the pizza on a hot stone.

Here are the ingredients that I used:  A grapefuit sized piece of Artisan dough (1/4 of the recipe), 1/4 cup pizza sauce, 2 cups mozzarella cheese, 1 cup pepperoni, corn meal to dust the pizza peel, a large pizza peel and a large stone.  Note:  my peel is 13 1/2" X 13 1/1/2" and my stone is 15" X 15"

Before you begin, start heating up your oven to 500 degrees with your baking stone in it.
Flour your hands and the top of the dough.  Break off a grapefruit sized piece of Artisan bread dough.  One recipe of the Artisan bread dough is enough to make 4 pizzas.  Two pizzas is enough to stuff my family of 6.


Shape into a flattened ball and start stretching it out.  I have found it helpful to put the dough over my fists and gently pull it apart as I rotate it around.  I haven't been courageous enough to throw it up in the air yet!


For the last bit of stretching, flour your counter and roll it out.  Roll it out large enough so that it is the size of your peel.


Dust the pizza peel with plenty of cornmeal so that the pizza will be able to slide off onto the stone.  Place the dough onto the peel.  I find that if I flip it over so that the most floured side is face down it helps it slide off better.


At this point, pick up the peel by the handle and shift it back and forth to make sure you have added enough cornmeal so that the dough slides back and forth.  If it doesn't, lift up the dough and add more cornmeal where it is sticking.


Start topping with whatever you choose.


After you have topped your crust, slide into your preheated 500 degree oven onto your hot stone.


My pizza takes anywhere from 7-10 minutes.  I would check it after 7 minutes and keep a good eye on it. When the crust is golden brown, use tongs to slide the pizza out onto a cookie sheet.  You can take the pizza out by lifting the whole stone out, but it is easier to handle by sliding it out onto another sheet.  This is also helpful if you are making more than one pizza because the stone will be ready for another one.


Let it sit for a couple of minutes, slice, and enjoy!


9:04 AM

Etham

"For My thoughts are not your thoughts, Nor are your ways My ways, declares the Lord." -Isaiah 55:8

So what is Etham?  Don't worry, I didn't know what Etham was either until a couple of days ago when I was doing a Priscilla Shirer bible study called One in a million.  This is a great study that gives so much insight about God leading us through our lives.  But anyway,  Etham was the place where God led the Israelites to camp right after He rescued them from Egypt.  It was a place right at the edge of the wilderness.  From this spot they could see in one direction the most direct route to the Promise Land.  In the other direction was the wilderness.  This is where Isaiah 55:8 comes in.  God's thoughts and ways were clearly different than what anyone else's would have been.  Who in their right mind would choose going in the opposite direction of the destination and head off into the wilderness?  But God could see the whole picture.  It says in Exodus 13:17-18  God did not lead them by the way of the land of the Philistines, even though it was near because the people might of changed their minds when they saw war and would want to return to Egypt.  It would be good for us to remember this story when life brings us in a direction that doesn't make sense.  As long as you are trying to lead a life that honors God and you are not living in open rebellion, don't assume hardship means punishment.   God may just want you to experience Him in a way you never would have otherwise.

"The Lord is righteous in all His ways and kind in all His deeds" -Psalm 145:17

8:23 AM

Abundant Living

Living in the United States of America, there is no doubt that I have experienced abundant living.  Look no further than any holiday dinner with a table full of so many side dishes one spoonful of each yields a full plate (not to mention dessert)!  Yet there are times when I do not feel so filled.  It is at these times that I look to the Scriptures to be reminded of where my joy comes from.  Here is a quote from  Jennifer Rothschild that says it so good. "Having our needs met and being ultimately satisfied are two different things.  Satisfying our needs is not the same as satisfying our souls.  We can easily believe that just because our earthly longings are satisfied our heavenly thirst is quenched.  However, we will still be thirsty until we have the ultimate satisfaction of intimacy with God Himself.  That only comes through His Word."

So here are some of those words.  They are found in Jeremiah 15:16 and it says "When your words came, I ate them; they were my joy and my heart's delight, for I bear your name, O Lord God Almighty."

5:21 AM

Guess Who's Serving Breakfast?

It is another cold winter day with not much sunshine.  I needed to find a bright spot in my day besides looking out the window!   I found these verses in John 21:12-13, "Jesus said to them, 'Come and have breakfast.'  None of the disciples dared ask him 'who are you?' they knew it was the Lord."  I've read these words before, but this morning they bring on new meaning.  I guess I never paid attention before to the meal Jesus was serving.  It was breakfast.  I know how good I feel as a Mom when I serve my family a good tasting, healthy, warm breakfast.  I love to serve my family in this way.  I can only imagine the joy Jesus had serving his disciples breakfast as they were coming in from fishing.  What a treat!  This was a morning none of them would forget.  If you read the whole chapter you find that Jesus performed a miracle with the fish they caught and now he was appearing to them.  This was after Jesus' death, what a way to start the day!  A miracle and a hot breakfast waiting for you as you pull up your boat with Jesus as the cook!  How often has Jesus showed up in my life wanting to serve me and I don't even recognize it is Him?  He desires to serve me. What a thought that is.  How often do I pass up opportunities to serve others and make the day of a friend that really needs it?  Thank God that he forgives me and continues to bless me despite my failures.  I thank God he has given me the Holy Scriptures to learn from and be blessed by.

Well, only RJ and I are up right now, I think I will surprise everyone else still sleeping with a nice breakfast.

5:23 PM

Chicken Pot Pie

I couldn't very well tell you I was having chicken pot pie for dinner, tell you how to make the crust, and then not show you how I make the pie now could I!  This is a family favorite in my household, especially during these cold winter days.  I hope it warms your family as much as it does mine.  Let me know how it goes if you decide to make it.  I would love to hear from you.

 You will need 1 cup cooked chicken, 1 cup carrots, 1 cup shredded potatoes (or however you want cut them), 1/2 cup celery, 1/4 cup onion, 1 can cream of chicken soup and enough milk to measure 2 cups when mixed with the soup, and 2 pie doughs.  These are the vegetables my family likes, feel free to make substitutions.


Preheat your oven to 425.  Roll out one pie dough on a well floured surface.  You may need to sprinkle the top of the crust with a little flour also.  Flouring your rolling pin seems to help too.  The recipe for the dough is in the last entry before this one.


After you have rolled out the dough, lay your pie plate on top to ensure you have rolled it out big enough.  The crust should go about 2 inches beyond the plate for it to be big enough.


Using a pastry scraper, lift the dough off the counter and place into the pie plate.


Position the dough in the center of the pie plate and gently press it down.  Using a fork, press the sides of the dough all the way around the dish.  This is to ensure the dough doesn't come away from the sides when it is baking. Also, poke holes in the bottom of the crust with the fork.


Now we are ready for the chicken filling!

Mix all the remaining ingredients together in a large bowl and pour into your prepared crust.


Roll out the other pie dough and place on top of the chicken mixture. Trim off excess dough.


Pinch the two pie crusts together, as shown, all the way around, to seal the top and bottom crust.


Poke more holes in the top of the crust to allow steam to escape while baking. Bake in a preheated 425 degree oven for 45 minutes.


Enjoy your chicken pot pie!

4:28 PM

Homemade Pie Crust

We are having chicken pot pie tonight for dinner, so I thought what better time to show how I make the crust.  This recipe was given to me by my husbands aunt.  It tastes just like what I have been making for 20 years, but is so much easier to make in my opinion.  It also makes 5 crusts at once which is nice because you can freeze them and it still tastes just as good.  It comes out nice and flaky no matter how much you handle it.  I hope you give it a try.

So here are the list of ingredients:  4 cup white flour, 1 3/4 cup shortening, 1 Tablespoon sugar, 2 teaspoon salt, 1 large egg, 1 tablespoon vinegar, 1/2 cup cold water.


Mix the flour, sugar, salt, and shortening with a pastry blender or fork until crumbly.


Mix together the egg, vinegar and cold water.


Make a well in the middle of the flour mixture and pour the water mixture into it.


Stir it up until it cleans the sides of the bowl.


Using floured hands, form the dough into a ball and put unto a floured surface.  Divide the dough into 5 equal parts.

Thats all there is to it!  Use it in any recipe that calls for pie crust.  It will roll out to make a standard 9" pie.  Any dough that you do not need within a couple of days should be wrapped in plastic wrap and put into a freezer storage bag and stored in the freezer.  Allow approximately an hour for it to defrost before using.

2:25 PM

Hand/Lip/Body Balm

One of the other benefits to the journaling I was telling you about is finding cool ideas for recipes and crafts you would of never found otherwise.  I was looking in a landscape magazine and came across an idea for making hand balm using herbs from your garden.  I do not have a very large garden (just strawberries), and it was late fall when I came across the idea, so I modified things and came up with this concoction.  Usually my hands in the winter are a mess.  I get dry cracked hands to the point of bleeding if I am not constantly putting lotion on them.  I really do not like the fact that my body is absorbing a bunch of stuff I cannot even pronounce!  This recipe has worked out very good for me.  I have been using it since mid November and I do not see myself using any other type of lotion.  It is especially good for elbows, knees, and heels.  Try it on your lips too!


The list of ingredients are as follows:  2 cups of olive oil, 1 1/4 cup of grated beeswax, 15-20 drops of essential oil of your choice (not necessary), 3-4 1/2 cup size heat resistant containers of your choice.


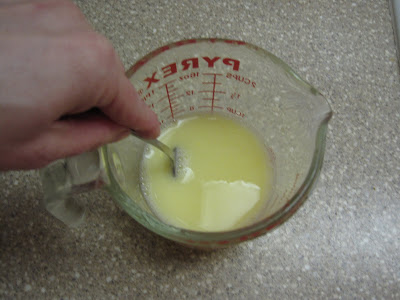
Pour the beeswax into the olive oil and heat on low.


As the beeswax is melting, add the essential oil of your choice.  I like to use tangerine because it is a good fragrance for your lips as well as your skin.  If you only want to make lip balm, peppermint is a good choice.  If you choose not to use any essential oil, the smell of the olive oil with a hint of honey will be what your balm smells like.


Once the beeswax is totally melted (it only takes about 5 minutes), pour the mixture back into the liquid measuring cup your olive oil was in.  This makes it easier to pour into your containers.


Now pour your mixture into the containers of your choice.  I used jelly jars and got 3 jars out of this batch.  Any small container that can take the heat of hot oil and beeswax will work.  It cools fairly quickly and is ready when you see that it is hardened and creamy looking (about an hour).


Some helpful tips:

You can find beeswax wherever candle supplies are sold.

You can find nice looking metal containers by candle making supplies, or heat resistant plastic containers by travel size accessories in the big box stores.

You can find a wide variety of essential oils at health food stores.

You can find chapstick type vessels online to pour your balm into.

Add slightly more beeswax for a firmer balm (more suitable for the above mentioned).

Add slightly more oil for a softer balm.

5:48 AM

Some Scripture About Sitting


As I showed you yesterday, I do a journal that involves tearing out pictures and pasting them on blank pages of a sketch book.  A couple of days ago I had pasted pictures of chairs all over the pages.  Don't ask me why, I just came across a lot of pictures of chairs and thought I would use them.  So when I started my day having some devotional time, I looked up some verses on sitting.  What I found interesting were these two. The first is from Deuteronomy 6:7 that is speaking about the commandments and it says "Impress them on your children.  Talk about them when you sit at home and when you walk along the road, when you lie down, and when you get up."  The second verse is found in Psalm 139:2 and it is talking about how much God knows about us and it says, "You know when I sit and when I rise; you perceive my thoughts from afar."  What struck me so much about these verses had nothing really to do about sitting.  In Deuteronomy we are told to teach our children the commandments.  And how are we to be doing that is by talking about them all the time.  He says we are to talk about them when we sit, when we walk, when we lie down and when we get up. Then Psalm 139 tells me that God is thinking about me just as much as He is asking me to think about Him!  It says he knows when I sit and when I rise.   Verse 7 continues with "You discern my going out and my lying down; you are familiar with all my ways.  Is there any time God is not thinking of me?  Not according to Psalm 139:6-7!

10:12 AM

Journaling that's Fun


Not to say that journaling on its own can not be fun, but for me I felt I never had time to just sit down and write my thoughts.  This is unique in the fact that it is not only my thoughts, but also my to-do list, a place where I can jot down cute things my kids say, scripture verses, prayers, etc.  Have you ever had a thought pop in your head that you didn't want to forget.  My journal is where I would write that down.  This is not my original idea, my sister shared it with me and she got it from a blog called A Holy Experience.  I leave my book out on the table.  My children have been known to leave me little messages, something that always puts a smile on my face!  I also know that the things I write can encourage my family sitting down for a meal.  I have never been into scrapbooking because of the time and space you need to do that.  This however takes practically no space and just a small amount of time.  All you need to get started is a sketch book, a magazine, and a glue stick.  I have pictured below some pages from my book.  You don't even need scissors! Just tear the pictures out that interest you and put them on the pages however you want.  I make up about a week of pages at a time (more if I'm on a roll with a good magazine!)  I am always amazed at the number of times the pictures have been relevant to the day I am having.  Also, if you are like me and had no magazines in the house, the thought of buying a bunch of magazines could cost a fortune.  I found the library sells dated ones for about 25 cents a piece. The library also has old books for $1 that are great for this project, like landscaping and gardening ones.  I hope you end up doing this.  I find it fun, rewarding, and I love that I can leave my children a legacy.