11:47 AM

Black Bean Chocolate Muffins


My friend Cindy brought these muffins to our annual camping trip and I immediately was addicted!  They have the perfect combination that is so hard to come by with muffins.  They taste great and are super good for you. There ends up being less than a tablespoon of sugar and oil in each muffin.  I am going to give you the recipe as I now make them- doubled- which makes 24.

 I find I like them two ways.  The first way is straight out of the oven nice and warm with a cup of tea.  The second way they are enjoyed in my household (perhaps more so than the first), is to pull them out of the frig and enjoy with a cold glass of milk.  They can be kept frozen or refrigerated for quite some time.  We have eaten them two weeks later out of the frig and have not noticed them tasting any different.  I should also mention you can get pretty creative with this recipe.  I have used wheat flour instead of oatmeal flour, milled chia instead of milled flax seed, and added  a handful of dried fruit and nuts.

As a side note, to make oatmeal flour just put some oatmeal in a high powered blender or coffee grinder and process until the consistency of flour. I must say I like the flavor oatmeal flour gives more than wheat flour.

So here is what you need to make 24 muffins:

1 can of black beans undrained
2/3 cup milled flaxseed
2/3 cup natural cocoa powder (baking cocoa)
1 cup raw sugar
2 cups oatmeal flour (or wheat)
2 tsp. baking soda
2 tsp. cinnamon
1 tsp. ginger
1 tsp. salt
2 cups shredded carrot (can also use zuchinni or a combination)
2 large eggs
2/3 cup coconut oil (or another oil of your choice)
2 tsp. vanilla


Step one is to open the can of beans and blend in a blender.  If you do not have a blender you can mash them by hand with a potato masher.


It should be this consistency when it is done being blended.  You can soak your own beans and boil them.   Just make sure you reserve some of the water you boil them in to blend with the beans to get this smooth consistency.  I have found that buying a .68 cent can of beans is just easier.


Preheat the oven to 350.


Line 2 muffin tins with cupcake liners.  You can also spray the pans with cooking spray if you do not have cupcake liners.


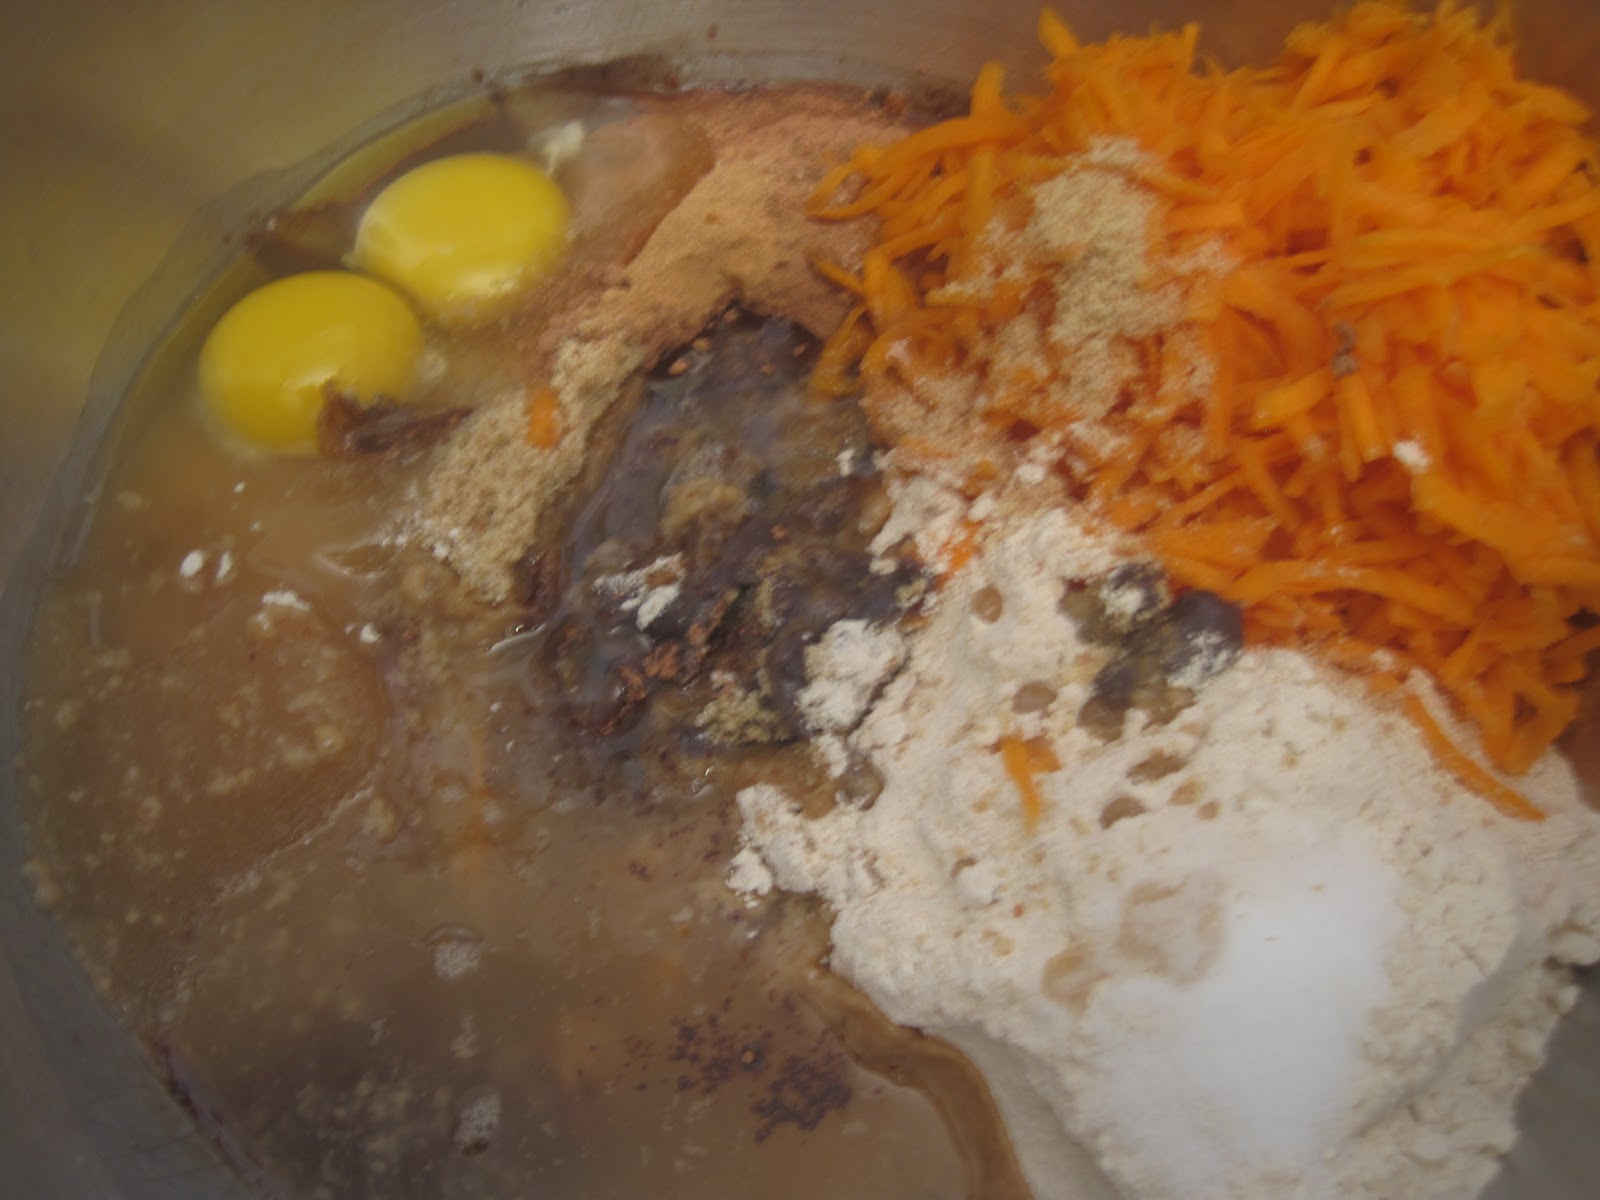
Combine all the ingredients in a large bowl and blend together.  If you are going to blend by hand it would be easier to mix the wet ingredients and then add the dry ingredients.  Here are the ingredients again:

2 cups pureed beans, 2/3 cup milled flax seed, 2/3 cup cocoa powder, 1 cup raw sugar, 2 cups of flour of your choice, 2 tsp baking soda, 2 tsp. cinnamon, 1 tsp. ginger, 1 tsp salt, 2 cup shredded carrot, 2 eggs, 2/3 cup coconut oil, 2 tsp. vanilla.


This is what it looks like when all the ingredients are combined.  This is also when I add any extra dried fruit or nuts.


Divide batter equally among the muffin tins and place in the preheated oven.  Stagger the tins and set the timer for 10-12 minutes.  After the timer goes off switch the tins and bake for another 10-12 minutes.


Enjoy these delicious muffins.  Whatever you don't eat warm, store in an airtight container in the frig or freezer.  Thanks Cindy for sharing this great recipe!

1:45 PM

New Mac and Cheese


I adapted this recipe from one I saw on Pinterest.  It seemed so simple that I had to try it.  It turned out good so here I am posting it.  I used Colby cheese instead of Cheddar as the recipe called.  Next time I think I will add a mixture of different cheeses, perhaps shredded Parmesan.

Here is what you need:

2 cups dry pasta (I used fusilli)
2 1/2 cups milk
1 cup shredded cheese
1 teaspoon salt
1/4 teaspoon dry mustard
1/4 teaspoon cayenne pepper

 Bring 2 cups of pasta to a simmer with 2 1/2 cups of milk.  Make sure the milk doesn't boil.  Stir often.  Let it simmer for 20-25 or until the pasta is cooked through.


Add 1 teaspoon of salt, 1/4 teaspoon dry mustard, and 1/4 teaspoon cayenne pepper.  Stir to combine.


Stir in 1 cup of shredded cheese and stir. All done! You could put it in a baking dish and add bread crumbs to the top and bake at 350 for an additional 10 minutes or so. Enjoy!


2:43 PM

No Sew T-shirt Apron

I created this apron quite by accident.  The way it began was me just cutting up one of my husbands stained t-shirts to use for rags.  By the way, t-shirts make great rags (I haven't bought paper towel in a couple of years!) As I started to cut I realized that it started to look like an apron.  A couple of trials later and this is what I came up with.


What you need:
1 t-shirt (at least a men's large, which I used)
scissors

Here are the steps:
First, read through all the instructions before you begin.
Lay the t-shirt out flat on a table and cut the sleeves off.


Determine what side of the shirt you are going to use for the front of the apron.  I actually had to use the back because there where stains on the front.  Either will work just fine. If you have a very noticeable tag in the back that cannot be removed you will have to take that into consideration.

What you are cutting right now will not be a part of the apron.

So begin cutting around the seams as shown.  Make sure you allow for the apron strings by leaving a strip uncut, just under the armpit.  Notice the picture.
Make the strip about 4 inches wide.


Cut the attached strip in half.


Cut each again so that you have 3 strips to braid.


Pull each strip so that it stretches and rolls into a sort of tube.


Braid the three strands and tie a knot at the end.


After you have done both sides the back of the apron is complete.


One last step.  Flip the apron over and cut off the two sides as shown.  Now your ready to start making dinner!

6:17 PM

Citrus Vinegar Cleaner


So here was one of the great ideas I found in a book called Salt, Lemons, Vinegar, and Baking Soda  by Shea Zukowski.  All you do is take the peels from any citrus fruit and put them in a glass jar and cover them with vinegar.  Let the mixture sit for at least 2 weeks and then it is ready to be used.

To use, combine 1 part mixture to 1 part water and put in a spray bottle.  That's it!  Because vinegar kills germs and also neutralizes smells,  I use it for cleaning surfaces, shining up my wood laminate floor, and cleaning glass/mirrors.  I really like the way it smells when putting all different citrus fruits together, like lemons, limes, oranges and grapefruit.  I have a couple of jars going at a time so that I never run out.  The mixture doesn't ever go bad and the longer you let it sit the stronger citrus smell you will get.

11:56 AM

Potato Frittata


I found this recipe in the Better Homes and Gardens March 2012 issue.  I was thumbing through this magazine at just the right time as my brother-in-law had just brought me 4 dozen farm fresh eggs and I was in great need of a meal to serve my family with no time to get to the grocery store.  Everyone liked it so I thought you might too!


Here is what you need:

1 lb of potatoes, scrubbed and thinly sliced
2 tablespoons olive oil
2 carrots, thinly sliced
12 eggs
1/4 cup green onion chopped
1 garlic clove, crushed
1/4 tsp each of salt and pepper


Start by preheating your oven to 350 degrees.


Slice up 1 pound of potatoes thinly.  I like to use a mandolin for a quick job.  I used russet and gold potatoes for mine.  Next time I will add red potatoes also.


Soooo quick and easy using a mandolin!


Add two tablespoons of olive oil to an oven safe pan (one of the many benefits of using cast iron).  Heat the oil over medium heat.


Cover the skillet and cook the sliced potatoes for 5 minutes over medium heat.


While the potatoes are cooking, slice up a couple of carrots and then add them to the potatoes.  Cover the pan again and cook another 5 minutes.


While the potatoes and carrots are cooking, whip up one dozen eggs.  I know this is a lot of eggs, but when you are serving it as a meal to feed 6 people, that's only 2 eggs a piece.


Add half of the green onion (1/8 cup), a clove of garlic, and 1/4 tsp each of salt and pepper to the eggs.


Pour the egg mixture over the potatoes and put the pan in the oven.  Bake at 350 for 25-30 minutes.  Mine took 30 minutes.


You know it is done when there is no runny egg on top.  Loosen the sides with a sharp knife and use a spatula to loosen the bottom.  Place a serving plate over the top of the pan and then flip the frittata onto the plate.  Top with remaining 1/8 cup of green onion.

Some other things I thought might be good are serving with salsa on top or adding meat (such as ham or bacon) to the egg mixture.


10:22 AM

Gluten Free Flourless Chocolate Cake


Adapted from Trader Joe's Flourless Chocolate Cake

Here is what you need to make this delicious flourless cake:
16 oz semisweet chocolate chips
1/2 cup plus 2 T butter
5 large eggs separated
1/4 teaspoon vanilla
1/4 teaspoon chili powder


Combine 16 oz of semisweet chocolate chips and 1/2 cup in a heatproof bowl and set over a pan of simmering water (or use a double boiler) and melt, stirring often.  


While chocolate is cooling a bit, use the remaining 2 tablespoons of butter to butter the pan and line with parchment paper, then butter the parchment paper. Preheat oven to 375.


Separate 5 eggs and put into 2 medium bowls.


Whip egg whites until stiff peaks form.  I ended up whipping mine a bit more after I took this picture.  With the same beater, beat the egg yolks together.


Add the egg yolks, 1/4 teaspoon chili powder, and 1/4 teaspoon vanilla to chocolate.  Fold in 1/3 of egg whites into chocolate mixture and follow with the remaining 2/3's.  


Fold until no white remains, trying not to deflate the batter.


Pour into prepared pan, the pan should fill 3/4 of the way.  Bake at 375 for 25 minutes.


Cool cake on a rack for 10 minutes then unmold.


6:33 AM

Sprouts!


A couple of weeks ago a friend of mine suggested I post doing sprouts.  I hadn't done this in a while and was excited to get back into it.  I purchased my sprouting seeds at English Gardens, but have also done lentils, split peas, and wheat berries that you can get at the grocery store.  I use them in my salads, sandwiches, as a snack, and in stir fry.  You probably could let me know some other ways you use them, I think the possibilities go beyond what I use them for.

The way I grow them is in a glass Mason jar.  All you need is the jar, a piece of cheese cloth or screen, and the rim.  The screen I use is just a piece of ordinary screen you would get from the hardware store.  If you know me, I would be happy to give you some.  The cheesecloth works just fine too, it just isn't as easy to rinse your seeds.

It is recommended to disinfect your seeds before you begin.  To do this, soak your seeds for about 15 minutes in a solution of 1 cup of hot water and 1 tsp of bleach.  Drain and rinse before proceeding.

Measure 1 1/2 tablespoons of seed and fill your jar with water.  Swish it around and then drain.  Fill the jar again with cool water to completely cover the seeds.


After 24 hours rinse the seeds again and drain the water from the jar.  If you are using the screen, there is no need to take the lid off.  If you are using the cheesecloth, you will have to take it off and strain it in a strainer.


After rinsing and draining the seeds, lay the jars down on their sides out of direct sunlight.  About 3-4 times a day give them another rinsing/draining.


In about 2 days you will start to see them sprouting.  I did three kinds of sprouts:  alfalfa, sandwich, and broccoli.  The Alfalfa has sprouted the fastest but the other two are only about a day behind.