7:42 PM

Marked


"And you were included in Christ when you heard the word of truth, the gospel of your salvation.  Having believed, you were marked with him with a seal, the promised Holy Spirit..." - Ephesians 1:13

It was a crisp fall morning when I entered the house returning from a run.  My husband approached me with a smile and said he bought me something.  A little confused, knowing it was too early for him to have gone anywhere, I asked him what it was.  He winked and said he bought a "toy" and really wanted to keep it.  I knew exactly what he was talking about at this point and played along.  

You see, my son loves Disney movies, especially Toy Story.  Sometimes when I enter a room he spontaneously plops down and stares off into space like he is Woody not wanting to be caught talking or playing by a human.  Well, Ron and I really started playing this up, pretending to pull a cord to hear him speak and soon the conversation came around to Ron putting his name on his foot so that everyone would know he had an owner.  To say RJ was pleased with this idea would be an understatement!  He giggled when Ron was writing his name and then looked more satisfied with the results than Woody did when Andy had done the same to him.  

My husband and I thought at the same time what an example this is of what Christ has done for us.  Ephesians 1:13 says, "And you were included in Christ when you heard the word of truth, the gospel of your salvation.  Having believed, you were marked with him with a seal, the promised Holy Spirit..."

The word "DAD" has been washed off my son's foot after a couple of showers, but how comforting to know that our heavenly Dad has him marked with a permanent seal that will never be washed off.  When you trust all that Christ has done for you, you too have a seal, a promise from the Jesus who has never broken a covenant, ever.

6:40 PM

Chicken Nuggets


Recently my sister told me she found a recipe for chicken nuggets.  My little guy loves chicken nuggets but I always cringe when buying them because who really knows what are in them?  I adapted this recipe from what I found from this blog.  My family really enjoyed them and I am sure you will too.  I advice three things after making these that I would like to pass on to you.  First, invest in a cookie scoop.  It will make the job go so much quicker! Second, double the recipe and keep some on hand in the freezer for a quick snack.  Thirdly, if you do not have a way to grind your meat at home, using already ground chicken that you buy at the store works just fine too.

Here is what you need:

Chicken Mixture:
 4 1/2 chicken breast cup up (or 2 pounds of ground chicken)
1 egg beaten
1 1/2 teaspoon salt*
1 teaspoon celery salt (I did not have any and likewise left it out, it tasted fine to us without!)
1 teaspoon onion powder
1/2 teaspoon black pepper*
*note that using Kosher salt and coarse black salt taste best, but use what you have on hand

Egg Wash:
2 beaten eggs

Seasoned Flour:
1 cup all purpose flour
1/2 teaspoon salt
1/2 teaspoon pepper
1/2 teaspoon onion powder
1/4 teaspoon paprika
1/4 teaspoon baking powder

Frying:
I used canola oil in my deep fryer, but you could also pan fry them.


Grind up the chicken. Or, open your package of already ground chicken from the store!  Mix the chicken with 1 egg, 1 1/2 teaspoon salt, 1/2 teaspoon celery salt (if using), 1 teaspoon onion powder, 1/2 teaspoon pepper.


Using a wire whisk, blend together 1 cup flour, 1/2 teaspoon salt, 1/2 teaspoon pepper, 1/2 teaspoon onion powder, 1/4 teaspoon paprika, 1/4 teaspoon baking powder.


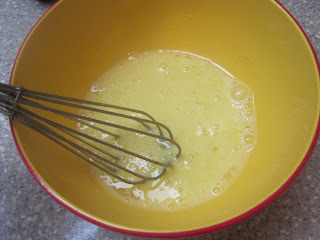
Beat together 2 eggs for the egg wash.


Using a cookie scoop, or your hands, roll 1 1/2 tablespoon of the meat mixture into balls.  Dip the balls into the seasoned flour and flatten the balls down with your fingers.


Take the flattened balls and dip them in the egg wash.  Place them on a cookie sheet that is either sprayed or parchment lined because they will start to stick.


Place the chicken pieces back in the seasoned flour mixture.


Now they are ready to be fried.


I used a deep fryer for mine, but it would be easy to pan fry them also.  Just fry until they are golden brown on both sides.


Enjoy!

4:54 PM

Pesto Sauce


This past Friday we were with our small group from church and the hostess made the most incredible pesto pizza.  That reminded me that I needed to gather my basil from the garden before the cold weather claimed it.  I had enough to quadruple the recipe so I thought I would show you a neat trick my sister taught me.  Using muffin tins you can freeze them in convenient portions.

What you need:
 4-5 cups fresh basil
2/3 cup grated Parmesan cheese
2/3 cup olive oil
1/4 cup pine nuts, almonds, or walnuts
1 teaspoon salt
1/8 teaspoon pepper
2 cloves crushed garlic

Gather approximately 5 cups of basil and wash it.  Combine all the other ingredients and place in a blender and blend until well combined.  If you are not going to use it right away, it can be frozen.  Follow the next steps to freeze.


Spoon the mixture into muffin tins.  No need to oil it first, there is enough oil in the mixture to keep it from sticking too bad. Place the filled muffin tins in the freezer until frozen through (a couple of hours).


After frozen through, run a knife around each circle of pesto and pop out with a spoon.  Take each pesto round and place in a freezer bag.  To use, defrost and store in the refrigerator.  Try using it like my friend did in place of sauce and cheese on a pizza crust, topped with tomatoes.

12:48 PM

Origami Leaves


Fall is many peoples favorite time of year.  I am guessing it is not because we are one step closer to winter, but because of the beautiful fall colors.  I love the oranges and reds that this season of Autumn brings outside.  Gathering these warm colors into my home is something I look forward to every year.
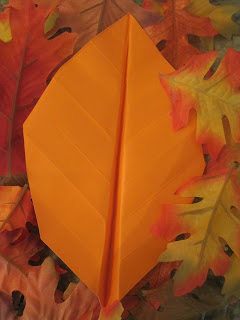
 I was working on an origami project with my oldest daughter a couple of weeks ago and I had so much fun with it I decided to make these leaves to hang from my chandelier and place around my mantle.  I found this great website that has step by step instructions.  You can get to it by clicking here.  I should also mention that you use square pieces of paper to make origami.  To make the "maple leaf" I used pages from a garden book. I chose fall colored pictures.  You could also use magazine pages. If you go this route you only need color on one side of the page.  The size paper I used for this was approximately 9X9 which produced a 4X4 leaf.  For the "dead leaf" I took a 12X12 piece of scrapbooking paper and quartered it first (so I got 4 leaves out of 1 piece of paper).  It produced a leaf that was approximately 8X8.  If you choose to use a magazine page for this kind of leaf, you will see both sides of the page.
I hope you have a great time with this project.  Please post a comment and let me know how it went for you.  I would also love it if you became a member of this blog, it helps keep me motivated to post more things for you!

12:46 PM

Pecan-Crusted Pork with Orange-Maple Glaze

Recipe adapted from Better Homes and Gardens/Jill Lust

Pork is just not a meat that I prepare very often.  It's not that I don't like it, in fact I love it.  But the only time I really think about serving it is this time of year because it always sounds good with applesauce.  Apples are a fall fruit, so I guess that's why I am thinking about it now.  Although this recipe doesn't call for apples, it does have two unusual ingredients that I never considered putting together with pork, maple syrup and pecans.  I found the recipe in the September issue of Better Homes and Gardens and just made it for lunch.  It was delicious, a perfect spicy/sweet combination.

Here is what I used to make 4 lunch servings:

6 pieces of pork tenderloin cut to 1/2 inch thickness
salt and pepper to taste
4 tablespoons maple syrup
1 cup pecan pieces, finely chopped
2 tablespoons oil (approximately) to brown the meat
2 oranges (1 juiced, 1 sectioned)
1/4 teaspoon ground cumin
1/4 teaspoon cayenne pepper

Season the pieces of pork with salt and pepper.


Pour 3 tablespoons of maple syrup on a plate.  Pour 1 cup of chopped pecans on another plate.  Coat either side of the pork pieces first in the syrup, then in the pecans.


Heat the oil in a skillet on medium high heat.  Add the pork pieces and brown on either side.  It only takes about 4 minutes on each side to cook it through if your pieces are cut to 1/2 inch thickness.


Set the browned meat aside and make the sauce.  To do this, squeeze the juice from 1 orange (or use 1/4 cup orange juice) and combine it with 1 tablespoon maple syrup, 1/4 teaspoon cumin, and 1/4 teaspoon cayenne pepper.


Pour the sauce back in the skillet you browned the meat in.  Let simmer until slightly thickened.


Section an orange and place on the pork.  Pour the thickened sauce over the meat platter.


Serve it up while it is nice and warm.  A good side dish is rice and a steamed green vegetable like beans or pea pods.

2:50 PM

Bedouin Bread


I am doing a Bible study called Woven, A Tapestry of Stories- Women of God Through the Ages,  by Wendy Eason.  I can relate to the women of the Bible in many areas of my life, but what better way than to make bread the way the people of Israel did then (and now!).  Wendy offered a challenge that I wasn't about to let pass me by.  She gave our class of women this recipe and offered "extra credit" to anyone who attempted it.  I just pulled mine out of the oven literally 5 minutes ago and 2 loaves are already gone!  I wonder if Rachel and Leah had to shoo all those boys out from around the brick oven to keep them from eating all the loaves before the rest of their dinner was done!

Here is what you need to make 8 loaves:

1 tablespoon yeast
1 tablespoon honey
1 1/4 cup tepid water
3 1/2 cups flour (I used all purpose)
1 teaspoon salt

Dissolve 1 tablespoon yeast and 1 tablespoon  honey in water.

Using a wire whisk, blend 3 1/2 cups flour and 1 teaspoon salt.

Pour the water mixture in the flour mixture.

Mix well then knead about 10 minutes until it forms a smooth ball.

Divide the dough in 8 pieces.

Flatten each piece into a 5" circle and place on lightly greased cookie sheet or parchment paper.

Cover with a clean towel.  Let rise 1-2 hours.  It should rise to between 1/2-3/4" thick.

Preheat oven to 500 and bake for 7-8 minutes.  I slid my dough off the cookie sheet (still on the parchment paper) onto a baking stone that I had heating in the oven during the preheating.

So yummy, thank you Wendy for the recipe and an even bigger thank you to my Lord who provides bread along with the rest of my needs every day!


10:46 AM

Yellow Cake Mix (with confetti)


We celebrated the 18th birthday of my daughter a few days ago.  One of her favorite cakes is confetti cake.  I really don't like buying cake mixes from the store so I started making up my own mixes to have on hand for special occasions.  I adapted this recipe from one I found at melskitchencafe.com.  Discovering that I was out of cupcake liners to late to go to the store, I improvised and used cake cones for half of the recipe.  There is something very satisfying to making a cake from scratch.  I hope you are filled with a sense of "well done" after you pull this out of the oven.

What you need for the mix:

2 cups sugar
1 1/2 cups all purpose flour
1 1/2 cups cake flour*
1/2 cup dry milk
1 tablespoon baking powder
1 teaspoon salt
1 cup butter cut into 1/2 inch pieces
1 tablespoon vanilla extract
1/4 cup candy rainbow sprinkles

*if you do not have cake flour you can make your own by measuring out 1 1/2 cup of all purpose flour in a bowl then take out 3 tablespoons of the flour and substitute with 3 tablespoons of cornstarch.  Stir with a wire whisk to mix.

Additional ingredients to make the cake:

1 1/4 cups warm water
2 large eggs


In a large bowl,  using a wire whisk,  mix together all the dry ingredients (except the sprinkles)


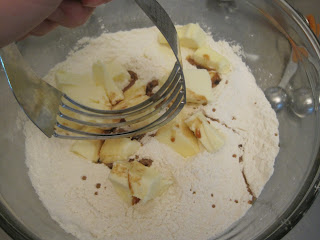
Using a pastry blender, incorporate 1 cup of butter and 1 tablespoon of vanilla.


It should look like this when it is done.


Stir in 1/4 cup rainbow sprinkles.  If you are just making a yellow cake, obviously omit  the sprinkles.

If you are not going to be making the cake right away, this mix can be stored in a sealed container (or ziplock bag) in the refrigerator until ready to use.  To make the cake, continue on!


Preheat oven to 350.

To the dry mix, add 1 1/4 cups water and 2 large eggs.


Mix on medium high speed until well blended.


Pour into your choice of cake pan.


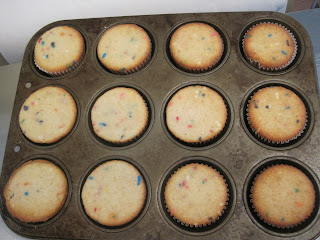
This makes the same amount as a store bought cake mix.  It should make 24 cup cakes, but if you choose to use ice cream cake cones like I did, you will have extra batter to make more than 24.

Bake until golden brown and the center springs back when lightly touched.  Here are the approximate bake times depending on what kind of pan you use:  cupcakes 20 minutes, 2 9" rounds 25 minutes, 9X13" 35- 40 minutes, 12 cup bundt 45-50 minutes. Oven temperatures vary which is why I say approximate.


Frost with your favorite frosting and enjoy!  I made my frosting by beating 1 cup of butter, 3 cups of powdered sugar, 2 tablespoons of milk and 1 teaspoon of vanilla extract until smooth and creamy. This was more than enough frosting to frost 24 cupcakes.


7:41 PM

Cinnamon-Streusel Coffeecake

King Arthur Cinnamon-Streusel Coffeecake

Making this coffeecake has become a regular part of my week.  It seems that there is always an occasion where I need to bring a baked good and lately I have chosen this one.  I originally found it on the King Arthur web site while searching for a good recipe for my friends favorite kind of cake.  It has the perfect moistness and cinnamon taste.  The original recipe I found called for twice as much crumb topping.  I still make up the same amount but reserve the extra and store it in my refrigerator for when I make muffins to top them.  I have written the recipe for only half the amount but it is a great crumb topping to have on hand if you decide to double what I have written.

What you need:

STREUSEL TOPPING
3/4 cup sugar
1/8 teaspoon salt
3/4 cup all purpose flour
1/2 tablespoon ground cinnamon
3 tablespoons butter, melted

FILLING
1 cup brown sugar, light or dark
1 1/2 tablespoons ground cinnamon

CAKE
3/4 cup butter
1 teaspoon salt
1 1/2 cups sugar
1/3 cup brown sugar
2 1/2 teaspoons baking powder
2 teaspoons vanilla
3 large eggs
3/4 cup sour cream or plain yogurt
1 1/4 cups milk (anything from skim to whole)
3 3/4 cup flour


Preheat the oven to 350.


Lightly grease a 9 X 13" pan.
(I ran out of cooking spray and had to oil mine my hand.  I think I put a bit too much.)


Make the topping by whisking together 3/4 cup sugar, 1/8 teaspoon salt, 3/4 cup flour, 1/2 tablespoon ground cinnamon, and 3 tablespoons melted butter.


It should look like this when it is all combined.  Set the topping aside.


Make the filling by mixing together 1 cup brown sugar and  1 1/2 tablespoons ground cinnamon.  Set the filling aside.


To make the cake:  In a large bowl, beat together 3/4 cup butter, 1 teaspoon salt, 1 1/2 cups sugar, 1/3 cup brown sugar, 2 1/2 teaspoons baking powder, 2 teaspoons vanilla extract.  Add the 3 eggs, one at a time, beating well after each addition.


In a separate bowl, whisk together 3/4 cup sour cream or plain yogurt and 1 1/4 cup milk.  You don't need to whisk out all the lumps.


Add 3 3/4 cup flour alternately with the milk mixture, beating gently to combine.


Pour/spread half the batter (about 3 cups) into the prepared baking dish.


Sprinkle the filling over the batter.


Pour the rest of the batter over the filling.  Using a table knife, gently swirl the filling into the batter.  Don't combine filling and batter thoroughly; just swirl the filling through the batter.


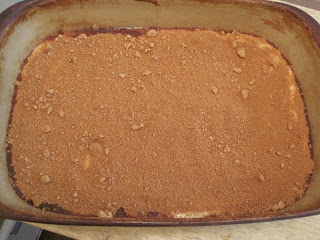
Sprinkle the topping over the batter.


Bake the cake until it is a dark golden brown around the edges; medium-golden with no light patches showing on top, and a toothpick or cake test inserted into the center comes out clean, about 55-60 minutes.  When pressed gently in the middle, the cake should spring back.  Allow it to cool for 20 minutes before cutting and serving.

Note: This recipe can be made the night before, covered with plastic wrap, and baked in the morning.  Just add about 5 minutes on the cooking time.