6:49 AM

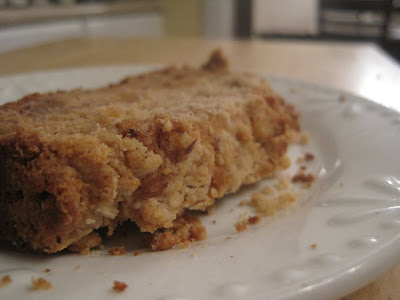
Banana Bread (Sugar Free!)

Yesterday was my daughters last day of her freshman year a Saginaw Valley State University.  We went and loaded all her belongings into our van and she is home!  It feels so good to have our whole family all under one roof again.  After such a busy week of hardly being home, it felt so good yesterday evening to just bake some bread!  I have figured out that I am the happiest when I am running or baking.  Last night I baked, and I am happy:).

I found this recipe in the May issue of Family Circle and adapted it for may family.  I have some family members and friends who are diabetic and I like to try out sugar free recipes, especially ones that do not use artificial sweeteners.  This one turned out wonderful.  The bread itself I would not change one bit unless it would be to substitute some wheat flour for the white flour.  But the crumb topping, if not baking for a diabetic, I would add sugar to (or maybe more honey) - it was a tad bit plain.

Here is what you need for the topping:

3/4 cup all-purpose flour
1/4 cup butter (1/2 stick)
1/4 cup finely chopped walnuts
1 tablespoon honey
pinch of salt

Here is what you need for the banana loaf:

2 cups all-purpose flour
2 teaspoons baking powder
1/2 teaspoon salt
1/8 teaspoon baking soda
2 large eggs
2/3 cup honey
2/3 cup canola oil
2 large over-ripe bananas, mashed
1 teaspoon vanilla extract
1/2 cup walnuts, chopped to your liking

Heat oven to 350.  Coat a 9 X 5 X 3-inch loaf pan with nonstick cooking spray.

To make the topping:
In medium-size bowl, blend together flour and butter with a pastry blender or fingertips.  Stir in nuts, honey and salt, then work mixture together with your hands to make crumbs.  Set aside.


To make the banana loaf:
In large bowl whisk together flour, baking powder, salt, baking soda.  Make a well in the center of the dry ingredients.  In medium-size bowl, whisk eggs, honey, oil, mashed banana and vanilla.  Pour into well in flour mixture and stir until just combined.  Stir in nuts and transfer batter to prepared pan.  Sprinkle with topping.


Bake loaf at 350 for 55 minutes.  Cool in pan on wire rack for 20 minutes then remove from pan directly to cool completely.

Serve with some milk or tea and enjoy this sugar free treat!

8:24 AM

Stuffed Flank Steak

I was looking through the latest issue of Family Circle magazine and found this recipe.  It's great because it only calls for a few ingredients and it tastes great!  I hope you give it a try.

What you need:  1 flank steak (about 11/2 pounds), 1 package (10 oz) frozen chopped spinach (thawed and squeezed dry), 4 oz feta crumbled cheese, 2 tablespoons olive oil, 1 lightly beaten egg, 3/4 teaspoon salt, 1/2 teaspoon black pepper.


Heat oven to 425.  Coat with cooking spray a broiling pan.

Lay steak on work surface.  Starting at a long side, slice steak in half without cutting through all the way.
Open like a book and flatten to an even thickness.

In a bowl, combine spinach, feta, bread crumbs, 1 tablespoon of the oil and the beaten egg.

Season steak with 1/2 teaspoon of the salt and 1/4 teaspoon pepper.  Press spinach mixture onto steak, leaving a 1-inch border.  Beginning on a short end, roll up to enclose filling.  Tie steak with cotton twine at 2-inch intervals.  (I used dental floss because I did not have any cotton twine.)


Rub steak with remaining tablespoon oil and season with remaining 1/4 teaspoon each salt and pepper.  Heat large nonstick skillet over medium-high heat.  Brown meat on all sides, about 5 minutes total.  Transfer steak to prepared broiler pan.


Roast at 425 for 35 minutes.  Remove meat from oven; let rest, covered, 10 minutes before slicing.  Enjoy your delicious steak!

12:36 PM

So far

As I mentioned before, I am doing a bible study called Anointed  Transformed  Redeemed by Priscilla Shirer, Beth Moore, and Kay Arthur.  Today's lesson brought me to 2 Samuel 7:18-20.  Here are King David's beautiful words to God, "Who am I, O Sovereign Lord, and what is my family, that you have brought me this far?  And as if this were not enough in your sight, O Sovereign Lord, you have also spoken about the future of the house of our servant.  Is this your usual way of dealing with man, O Sovereign Lord?"

Are you ever in that moment, like David, when you are praising God for bringing you "so far" and you realize it is only because He must be crazy in love with you to pursue you after all your sin and rebellion?  I am so undeserving of God's gifts, but that doesn't stop Him from continuing to bring me further and deeper into a loving relationship with Him.  I am certain David's mother must have been praying for him.  The bible doesn't mention her, but he had a firm foundation didn't he?  He realized it was not on his own merit that he had been blessed and I am pretty certain that is because his mother, or someone, must have been praying for him.

Praying for our families and other people in our life is so important.  It brings me great comfort to know my parents pray for me.   One way to do that is to pray God's Word back to Him.  In this study, Beth Moore cited some verses to start you off doing this.  Please look them up, write them down and start praying these for the people in your life and for yourself.  The verses she gave are:  Psalm 18:16-19, Proverbs 2:7-8, Proverbs 4:23-27, Romans 12:1-2.  Please search the Scriptures and add to this list.  I would love to have anyone share additional verses they have found.

7:44 AM

Pita Bread

This is one of the easiest breads to make.  My cousin Annie sent me this wonderful cookbook called Artisan Bread in Five Minutes a Day by Jeff Hertzberg and Zoe Francois.  It has so many great recipes in it.  For this one I highly recommend a baking stone and a pizza peel.  The dough is the same recipe as the Artisan bread and the pizza crust. You can look at my other posts for those two recipes, but this is a refresher on how to make the dough.

I have found it convenient to write the ingredients right on the container lid of where I store the dough.  A plastic shoe box container or a container similar in size is what you need to make this dough.  It can be stored in you refrigerator for weeks.  This makes it so quick and easy to make pizza or bread last minute.

What you need:


Take all of these ingredients and pour them into the container and mix them up.  You can put them in a standing mixer first to mix it if you don't want to do it by hand, but either works just fine.  The water should be room temperature.

Put the lid on the container and let rise until the dough touches the top of the lid.  At this point you can either put it in your refrigerator for future use, or use it!  When the dough is cold, it is easier to work with.  For this recipe I used 1/4 of the dough to make 4 pitas.  Break off 1/4 of the dough. The dough will be sticky so make sure you flour your hands good.   It should be about the size of a grapefruit.

Put your baking stone in the oven and turn your oven to 500 degrees.  Next, divide your dough into 4 equal pieces.

Having floured your hands and your work surface, roll the pieces out to 1/8" thickness.  Be careful to get the dough to a uniform thickness.

Place all the rounds on a floured pizza peel and slide them onto the hot stone in the oven.  If you do not have a peel, you are going to very carefully place the rounds on the hot baking stone.


Bake for 5-7 minutes, until golden brown.  When you take them out of the oven, wrap them in a clean dish towel.  After I took the picture I wrapped them up all the way in the cloth.  The pitas will deflate slightly as they cool.  The space between crusts will still be there, but may have to be nudged apart with a fork.

Enjoy for sandwiches or cut up and toasted for dips!

5:45 PM

Homemade Chocolate Pudding

At least once a week my husband asks if I have made pudding for dessert.  Just about once a week I have to tell him "no".  This is mainly because I forget to buy it.  When Ron is with me for my grocery shopping trip and he remembers to grab some, he almost always get the kind he doesn't like, the instant.  Today I decided to try making my own.  I hope he likes it.

This is what you need:


Mix the cocoa, sugar and flour in a medium saucepan and then add the milk.

Bring it to a slow boil until it thickens.  When it does, add the vanilla and butter.

After the butter and vanilla are stirred in, pour into a bowl to cool.  I served mine with whipping cream but almost forgot to take a picture of the finished product.  I remembered when there was just this little bit left.  Ron thought it was not quite as good as Jello brand cook-n-serve, but better than the instant.  I loved it and it was easy to make.  I'm going to try to omit the butter next time and see how it turns out.

4:35 PM

Olga Bread Chicken Sandwiches

This morning I could think of nothing to serve for dinner tonight.  I had a whole afternoon dedicated to making a meal and posting it on this site, but nothing was coming to me as to what to make.  I even brought Makayla and RJ to the video store to rent them each a movie to keep them happy while I worked on it.  Much to my dismay we arrived to the video store too early for it to be open and had to buy some time.  We ended up at the grocery store so that I could do some brain storming.  I was aimlessly walking around when I saw chicken breast on sale.  Somehow the Olga bread came to my mind and I finally knew what I was going to have tonight.  My neighbor gave me this recipe for the bread a couple of years ago and it is always a hit when I remember to make it.  It can be made with whole wheat flour, but tonight I used white.

Here is what you need to make the bread: 1 cup milk, 1/4 cup warm water, 1/4 cup honey, 1 egg, 4 cups flour, 1 teaspoon salt, 1 tablespoon yeast (or one package), 1/4 cup butter, 1 teaspoon sugar.


Scald milk.  Place scalded milk in a large bowl with honey, butter, and salt.  Stir until butter is melted.  Let cool.


In a small bowl combine sugar, dry yeast and warm water.  You will know if your yeast is good if it bubbles.

Add 1 1/2 cups flour to milk mixture, add eggs, and mix well.

Add yeast mixture and 2 1/2 cups flour.  Mix until dough is sticky.  Knead on a floured surface or in a standing mixer.  If using a mixer, switch to a bread hook after you add the flour.


Place dough in an oiled bowl and cover.  Let rise until double in size, approximately an hour.

Gently turn the dough onto the counter and divide into 16 pieces.

Shape each section into a ball and roll out into 1/8th thickness, 8-10" round.

In a large heated skillet (cast iron works best) cook until golden brown on one side and then flip and cook the other side.

This is enough for 16 sandwiches!  You can freeze them in a ziplock bag if you don't use them all up within a day.

Now you are ready to make the breaded chicken to put on your Olga bread.  Or, you can put whatever you want on it!  Here is what I used (although I did end up needing more bread crumbs, about another cup):

Pound out the chicken, sprinkled them with salt, and cut them into strips.  Place the chicken in the milk and egg mixture.

Take one strip out at a time and roll them in the bread crumbs.  I used panko crumbs until I ran out, and then I used plain bread crumbs.

Now all you need to do is pan fry the chicken until they are browned and cooked through.

Place the chicken on your bread with some toppings of your choice and you will have a great tasting dinner!

1:51 PM

Best Ever Blueberry Muffins

This morning I wanted to make blueberry muffins for Makayla.  She loves grapes with blueberry muffins and most of the time we have one or the other.  Last night at my Bible study I was given grapes that we had leftover from our snack(many thanks to Marie) and I had just bought a large bag of frozen blueberries at Gordons, so I really wanted to surprise her with her favorite breakfast.  Makayla was very thankful and I was happy to do it for her.

Here is what you will need for the muffins:
1 1/2 cup all purpose flour
3/4 cup white sugar
1/2 teaspoon salt
2 teaspoon baking powder
1/3 cup oil (I use canola)
1 egg
1/3 cup of milk (I use buttermilk)
1 cup blueberries (fresh or frozen)


Preheat oven to 400 degrees.  Grease muffin tin or line with muffin liners.

Use a wire whisk to combine flour, sugar, salt and baking powder.

Place oil into a liquid measuring cup.  Add the egg and enough milk to fill to the one cup line.  Mix this with wire wisk and then pour into the flour mixture.


Fold in blueberries, being careful not to over mix the batter.

Divide batter equally in the muffin tin.

At this point you can either bake them for 20-25 minutes, or you can add an additional crumb topping.  It  adds more calories, but also more yumminess!

For the crumb topping you will need:  1/2 cup white sugar, 1/3 cup white flour, 1/4 cup butter.
Note:  This is enough topping for two batches.  I always store the extra in the refrigerator- it will keep for weeks.

Using a pastry blender, combine the sugar, flour and butter. (To save on dishwashing, I use the same bowl I made my batter in).


Sprinkle some of the crumb topping on each of the muffins.  You should have enough left over for another batch.

Bake them at  400 degrees for 20-25 minutes.  Enjoy them warm out of the oven, or cooled off.  They freeze well if you can get them to last long enough to put into the freezer!