10:22 AM

Gluten Free Flourless Chocolate Cake


Adapted from Trader Joe's Flourless Chocolate Cake

Here is what you need to make this delicious flourless cake:
16 oz semisweet chocolate chips
1/2 cup plus 2 T butter
5 large eggs separated
1/4 teaspoon vanilla
1/4 teaspoon chili powder


Combine 16 oz of semisweet chocolate chips and 1/2 cup in a heatproof bowl and set over a pan of simmering water (or use a double boiler) and melt, stirring often.  


While chocolate is cooling a bit, use the remaining 2 tablespoons of butter to butter the pan and line with parchment paper, then butter the parchment paper. Preheat oven to 375.


Separate 5 eggs and put into 2 medium bowls.


Whip egg whites until stiff peaks form.  I ended up whipping mine a bit more after I took this picture.  With the same beater, beat the egg yolks together.


Add the egg yolks, 1/4 teaspoon chili powder, and 1/4 teaspoon vanilla to chocolate.  Fold in 1/3 of egg whites into chocolate mixture and follow with the remaining 2/3's.  


Fold until no white remains, trying not to deflate the batter.


Pour into prepared pan, the pan should fill 3/4 of the way.  Bake at 375 for 25 minutes.


Cool cake on a rack for 10 minutes then unmold.


6:33 AM

Sprouts!


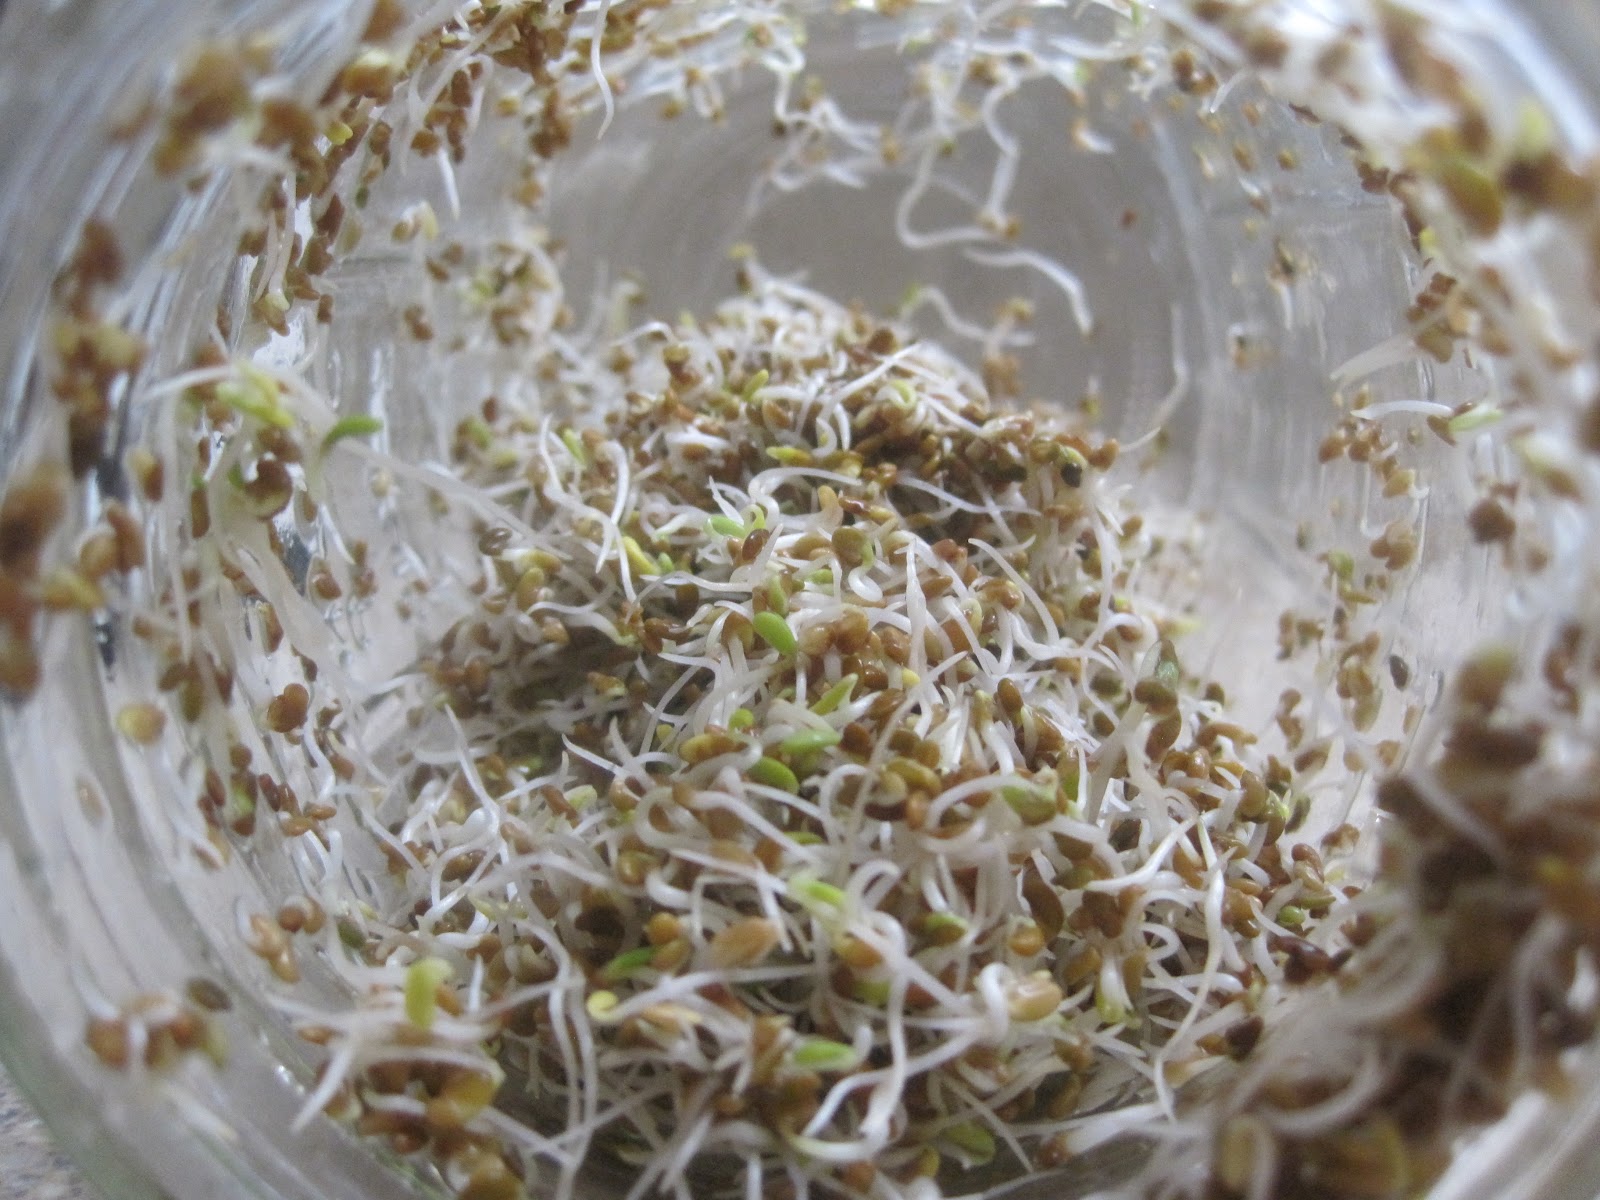
A couple of weeks ago a friend of mine suggested I post doing sprouts.  I hadn't done this in a while and was excited to get back into it.  I purchased my sprouting seeds at English Gardens, but have also done lentils, split peas, and wheat berries that you can get at the grocery store.  I use them in my salads, sandwiches, as a snack, and in stir fry.  You probably could let me know some other ways you use them, I think the possibilities go beyond what I use them for.

The way I grow them is in a glass Mason jar.  All you need is the jar, a piece of cheese cloth or screen, and the rim.  The screen I use is just a piece of ordinary screen you would get from the hardware store.  If you know me, I would be happy to give you some.  The cheesecloth works just fine too, it just isn't as easy to rinse your seeds.

It is recommended to disinfect your seeds before you begin.  To do this, soak your seeds for about 15 minutes in a solution of 1 cup of hot water and 1 tsp of bleach.  Drain and rinse before proceeding.

Measure 1 1/2 tablespoons of seed and fill your jar with water.  Swish it around and then drain.  Fill the jar again with cool water to completely cover the seeds.


After 24 hours rinse the seeds again and drain the water from the jar.  If you are using the screen, there is no need to take the lid off.  If you are using the cheesecloth, you will have to take it off and strain it in a strainer.


After rinsing and draining the seeds, lay the jars down on their sides out of direct sunlight.  About 3-4 times a day give them another rinsing/draining.


In about 2 days you will start to see them sprouting.  I did three kinds of sprouts:  alfalfa, sandwich, and broccoli.  The Alfalfa has sprouted the fastest but the other two are only about a day behind.

7:45 PM

Potato, Tomato, Spinach Soup

Recipe courtesy of Rachael Ray

I have my daughters new mother-in-law to thank for turning me on to this delicious soup.  This currently is my favorite soup.  No fancy ingredients and it is done in about 30 minutes.  It is thickened by the potatoes, not flour or cream.  Lots of good stuff in this one and it tastes so good.  I use turkey broth because I have some canned,  although the recipe calls for chicken broth.  I am tempted to use beef broth the next time I make it.

What you need:

3 cloves crushed or finely chopped garlic
1 large onion, chopped
2 tablespoons olive oil
2 quarts chicken broth
3 pounds all purpose potatoes, peeled and thinly sliced
1 pound fresh triple washed spinach, stems picked and coarsely chopped
1/4 teaspoon nutmeg, grated or ground
salt and pepper
1 (28-ounce) can chunky-style crushed tomatoes or diced tomatoes in puree
1/2 cup grated Parmesan cheese for topping

In a deep pot, saute 3 cloves of garlic and 1 large chopped onion in 2 tablespoons olive oil.  Add broth and bring to a boil.


As the mixture is coming to a boil, slice the 3 pounds of peeled potatoes.  Using a mandelin is extremely helpful.  Add the potatoes to the broth and cook for 20 minutes.  The potatoes will break up and thicken the broth as it cooks.


Coarsely slice up the spinach and add to the broth in bunches until it is all added.  Add the 1/4 teaspoon of nutmeg and salt and pepper.


Stir in tomatoes and heat through, 1 or 2 minutes.  After you serve up the soup in bowls, top with cheese.

11:50 AM

Seasoned Crackers


Seventeen years ago my daughter's preschool class had a Christmas party and this was one of the snacks served.  I have saved the recipe all these years and thought it would be a nice treat to put out for New Years Eve.  It's very tasty and very simple to make.

What you need is:
1 box of oyster crackers (approx. 14oz)
1 pkg of dry ranch dressing
1 tablespoon dill weed (I did not have any and it still tasted fine)
1/2 teaspoon garlic powder
1/2 teaspoon onion powder
1/2 cup oil (I used canola)

What you do:
Mix well.  Store in an air tight container

12:28 PM

Peppermint Patties


So, sorry I didn't get a chance to post this recipe before Christmas.  We enjoyed these cookies so much we made them a few times.  My cravings are returning this very moment just thinking about them!  Thanks to my friend who gave some to me for a Christmas treat, so I can now pass the recipe on to you.  Enjoy!

The ingredients are pretty simple:

1 cup milk chocolate morsels
1 sleeve of Ritz (or Ritz type) crackers
1/2 teaspoon peppermint oil
parchment paper

I should mention that all these ingredients are approximate.  When we made them we kept melting more chocolate and adding more oil to use up all the crackers we had.  I should mention that a mini crock pot is a very handy appliance to have when melting chocolate for something like this.


Begin by melting the chocolate with peppermint oil.  Dip one cracker at a time in the chocolate.  I found these small tongs worked great for dripping the excess chocolate off.


After you dip the cracker, place it on a parchment lined cooking sheet.  When the sheet is full, place in the freezer for about 10 minutes.  The cookies will pop right off when they are done.

6:04 PM

Homemade Fruit Snacks

"A longing fulfilled is sweet to the soul..."-Proverbs 13:19

Ever since the whole licorice endeavor I have been on a candy making kick.  I don't even like candy so much.  Don't get me wrong, I have a taste for sugar- just in other forms, like chocolate or other desserts.  I have a son and daughter who love fruit snacks though and when I saw how seemingly easy they were to make I decided to give it a try.  Most importantly this recipe tastes every bit as good as what you would buy in the store.  Now if I could only figure out how to make them with juice I would be a little happier!

Here is what you need:

2 packages of unflavored gelatin
1 3 oz package of flavored gelatin
1/3 cup of water
molds-helpful, but not necessary


Here are a couple of different mold I used.  In pictures further down I will show you another technique I used not using any molds.  Another mold you could use is any empty styrofoam egg carton.  I had many trial and errors concerning the molds.  I found the smaller you make them the better.  The red mold you see pictured worked best by only filling it until the bottom was covered.  Making them too big was too sweet for my liking.  I got the clear mold from a cake decorating store and the red one from Walmart.  It's hard to tell from the picture but the clear mold are the shape of jewels.  The good news is whatever you choose to use the candy peels out with ease.


In a small saucepan combine the 1/3 cup of water, 2 packages of unflavored gelatin, and 1 3oz package of flavored gelatin.  Stir slightly and let sit for 5 minutes.


After 5 minutes, put the pan on medium heat and stir until all the gelatin is dissolved.  This only takes a couple of minutes


Start pouring the liquid into the molds.  You have to work quickly because it turns into gel rather quickly.  I made quite a few batches which is why my liquid is a different color in this picture.


Here is what I started doing just to see what would happen if I made little blobs on a parchment paper.  They lack a fun shape, but it still worked.


This was my experiment using the top of my egg carton.


After you have your molds filled, put them in the freezer for no more than 5 minutes.  After you take them out of the freezer just peel them out of the molds.  If it seems a little sticky put some corn starch on your fingers.


Now they're ready to eat!


1:20 PM

Chewy Candy


"How sweet are your words to my taste, sweeter than honey to my mouth"-Psam 119:103

I had a request from my daughter to make homemade licorice.  This is something I had never done before, but the challenge was out there and I was determined to do it.  Since then I am convinced that you need a factory to make the kind you buy at the store.  However, my failed attempts tasted pretty good, hence, a new post!

What you need:
1/4 cup flour
pinch of salt (1/8 teaspoon)
1/4 teaspoon corn starch
1/8 cup vegetable oil
1 cup light corn syrup
1 6 oz. package of gelatin (your choice of flavor)
a candy thermometer (helpful but not necessary)

In a small bowl combine 1/4 cup flour, pinch of salt, 1/4 teaspoon corn starch, 1/8 cup vegetable oil.  Mix until smooth.


In a small sauce pan heat 1 cup corn syrup until it is at the soft ball stage on a candy thermometer, stirring constantly.


Now, if you are like me, and do not own a candy thermometer you can still do this.  I remembered from my Home Economics class back in high school (thank you Mrs. Schley) that to test to make sure you are at the soft ball temperature you spoon a small amount of the hot liquid into very cold water.  When it is at the right temperature the liquid will be able to be formed into a soft ball that can be squished down  (I'm guessing that's where the name came from!)  As I mentioned earlier, I had a few trials of this and it seems to work best if the ball is slightly firm.  It changes very quickly so play close attention. If you wait to long it goes into the hard ball phase and then it will be too hard to work with.


Remove pan from heat and stir in 1 6 oz. box of flavored gelatin.


Stir in the flour/oil mixture.


Pour the hot liquid onto a parchment lined cookie sheet.


It cools very quickly.  1-2 minutes is all you need to be able to start forming it.


This is how much the dough made.  You need to work quickly before the dough gets too hard.  It remains "chewy", but gets harder to work with the cooler it gets. For some of the dough we used mini cookie cutters to make some mittens and snow flakes.  My kids also made their initials.


The first batch I had little hands helping me.  The second batch I only had myself so I shaped them mostly into balls. This, by the way, seems to be the best shape for them to not stick together.  Toward the end the dough was getting harder to work with so I rolled it out and made a spiral shape out of it. The benefit of letting it get slightly firmer in the soft ball state is that when the candy is completely cooled they do not stick so much together, or at least you can separate them if they do.  I think I am going to make more colors and package them up for some gifts.
*An important side note I just discovered today (two days after I originally posted this) is that coating the candy in powdered sugar so that it doesn't stick together is a very good idea.  I had mine in a jar and they all stuck together.  It was a hassle getting it all out of the jar but after I got them out and coated them in the powdered sugar, it was fine.