8:09 PM

Breakfast Cookies


I always relied on my granola bar recipe to fall back on for an easy grab breakfast or snack.  While I still love that recipe, my friend gave me this one that I really am enjoying.  I love it that it makes 60 cookies and that they can be frozen then thawed easily to be kept on hand for a filling breakfast enjoyed with a cup of tea.  It is extremely easy to customize to your liking.  They also are packed with very healthy ingredients.  These somewhat remind me of the Kashi cookies if you have ever tried them.  You may not have readily available all of these ingredients, but if you have any resolve to start eating healthier, you should make it a point to have them in your pantry anyway!  Speaking of customizing, the way I was given the recipe it called for using orange juice instead of apple cider and orange extract along with the vanilla extract.  My family likes the apple cider better, but be creative and let me know some of your ideas.

What you need:
1 cup dry, uncooked oat bran
3/4 cup apple cider
1 heaping cup of apple sauce, unsweetened
2 tablespoons canola oil
1 cup honey
1/3 cup firmly packed brown sugar
3 large eggs
1 1/2 tablespoons vanilla extract
3 cups wheat flour (or white or a combination)
1 tablespoon baking powder
1 1/2 teaspoon baking soda
1 cup nonfat dry milk
2 1/2 cups oats (instant or old-fashioned)
1 cup nuts
1 cup raisins (or fruit of your choice)
1 cup ground flax seed

Preheat oven to 375 degrees.  Coat cookie sheets with cooking spray or oil.  They will stick if you do not.  I thought it might be a good idea to tell you if you live near a Gordon Food Service they sell sheet pan liners that can be used by cutting in half to line a typical cookie sheet.  One sheet can be used over again a few times before having to replace.

Mix 1 cup of oat bran and 3/4 cup apple cider in a small bowl and let soak for 10 minutes.


Meanwhile, combine 1 heaping cup applesauce, 2 tablespoons canola oil, 1 cup honey, 1/3 cup brown sugar, 3 eggs, 1 1/2 tablespoons vanilla extract in a mixing bowl.  Mix with an electric mixer until smooth.


Measure 3 cups flour, 1 tablespoon baking powder, 1 1/2 teaspoon baking soda and whisk them together.


Sprinkle the flour mixture over the honey mixture.


Add the soaked oat bran, 1 cup dry milk, 2 1/2 cups oats, 1 cup nuts, 1 cup raisins (or your choice of fruit), 1 cup ground flax seed.


Mix until well combined.


Drop my heaping tablespoons on your prepared cookie sheets.


Bake until lightly brown 12-14 minutes.


Enjoy with a tall cold glass of milk or a nice warm cup of coffee or tea!

7:42 PM

Creamy Butter Pecan Custard/Ice Cream

What a wonderful dessert to serve on a cool evening.  The aroma that filled my kitchen while making this is one I am excited to have you experience when you make it! You can prepare this as a custard or as an ice cream.  I made mine into ice cream, but was tempted to just leave it custard.  Either way, the effort involved with this recipe is well worth it. I was going to take pictures when the ice cream was served, but it was gone before I remembered.  Also, before I forget, this recipe was adapted from the cookbook that came with my Cuisinart Ice Cream Machine, an appliance 6 out of 6 of my family members recommend!

What you need:
4 tablespoons butter
1 cup pecan halves and pieces
1 teaspoon kosher salt (or sea salt)
2 1/4 cups whole milk
2 1/4 cups heavy cream
1 whole vanilla bean
4 large eggs
2 large egg yolks
1 1/8 cup sugar
2 teaspoons pure vanilla extract

Melt 4 tablespoons of butter in a skillet.  Add 1 cup of pecans and 1 teaspoon kosher salt.  Cook over medium-low heat until pecans are toasted and golden, stirring frequently, about 4 to 6 minutes.


Remove from the heat, strain (the butter will have a pecan flavor and can be reserved for another use, such as on your toast in the morning).  Chill the nuts.


Combine 2 1/4 cup of milk and 2 1/4 cup of cream in a medium saucepan.  Use a sharp knife to split the vanilla bean in half lengthwise.  Use the blunt edge to scrape out the "seeds."  Stir the seeds and bean pod into the milk/cream mixture.  Bring the mixture to a slow boil over medium heat, reduce the heat to low, and simmer for 30 minutes, stirring occasionally.


At this point the everyone in the house starts wandering into the kitchen wanting to know what smells so good!

Just a side note, Costco sells whole vanilla beans a lot less expensive than the grocery store.  Don't skimp on this step! Vanilla extract will not produce the same wonderful flavor as using a vanilla bean.


Combine 4 eggs, 2 egg yolks, and 1 1/8 cups of sugar in a stand mixer or in a medium bowl using a hand held mixer.


Blend on medium speed until until the mixture is thick, smooth, and pale yellow in color (similar to mayonnaise), about 2 minutes.


Remove the vanilla bean pod and discard it.  Or rinse off the pod and add it to your strained pecan butter, yummy by the way!  Pour one cup of the hot mixture into a liquid measuring cup.


With the mixer on low speed, add the cup of hot milk/cream mixture to the egg mixture in a slow, steady stream.


When thoroughly combined, pour the egg mixture back into the saucepan and stir to combine.  Cook, stirring constantly, over medium low heat.


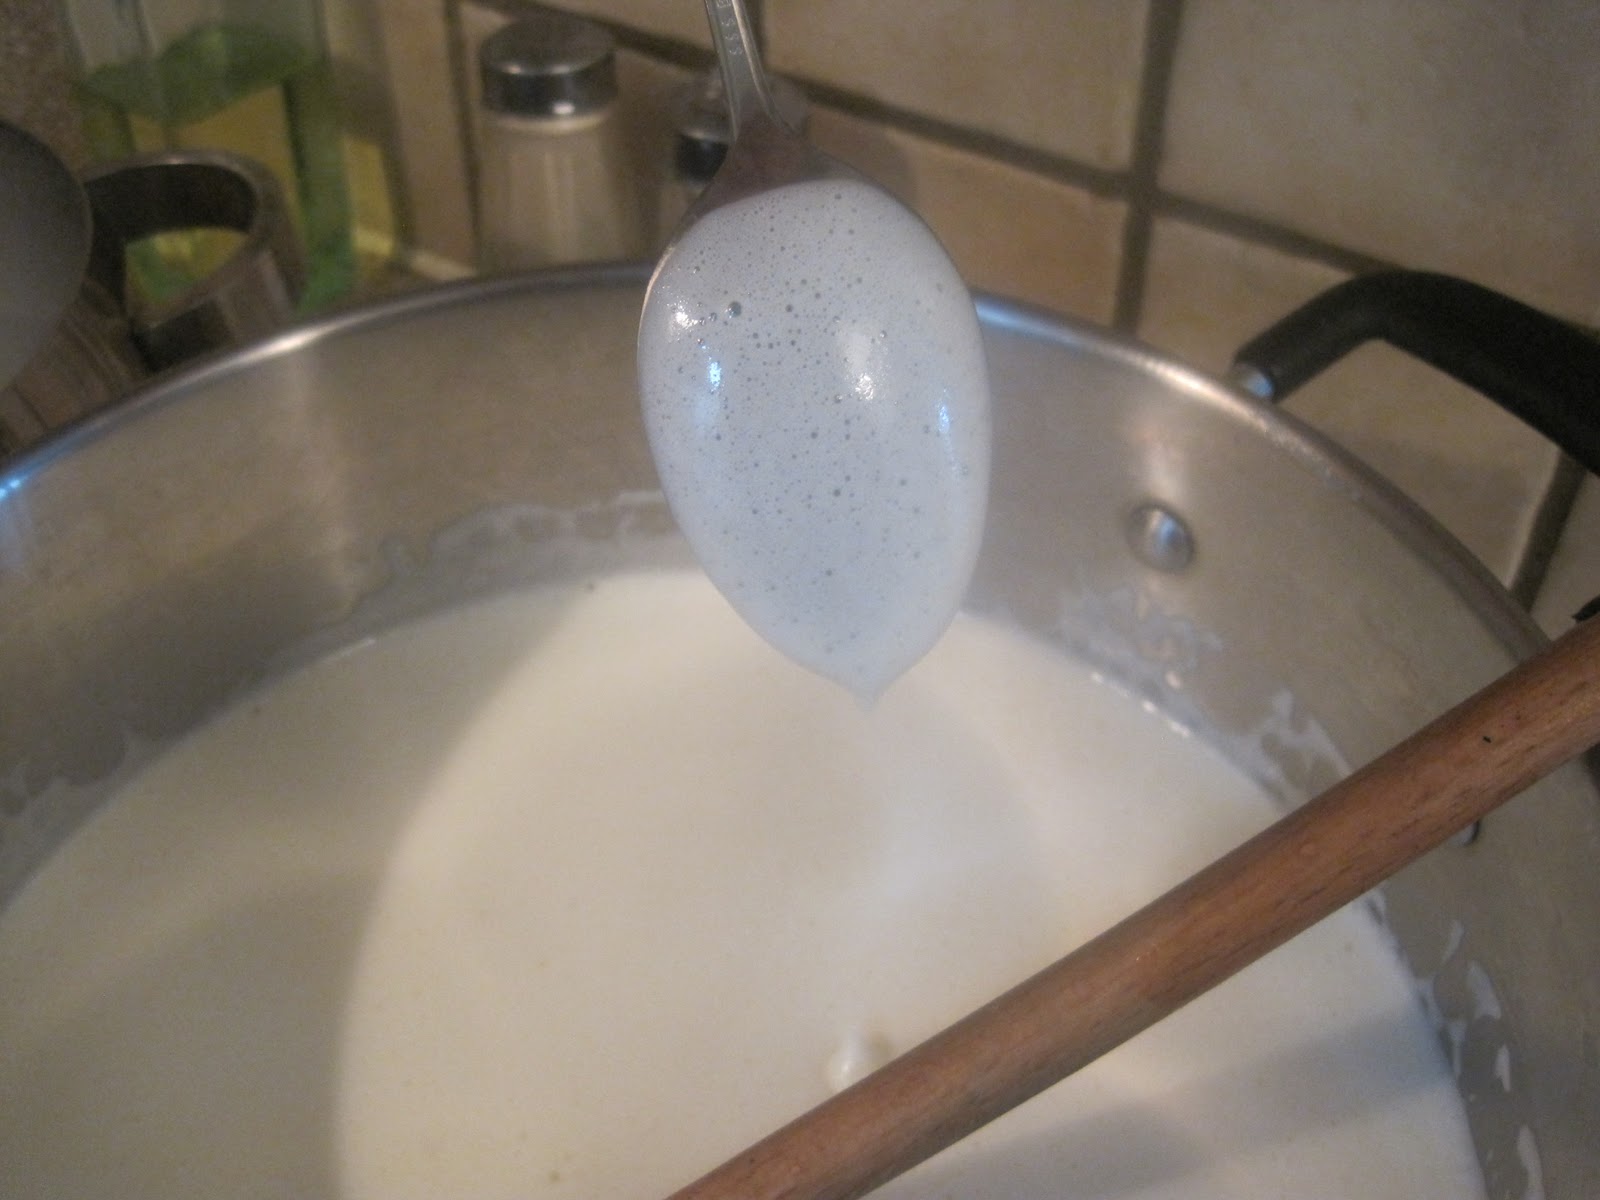
Cook, stirring constantly, over medium low heat until the mixture is thick enough to coat the back of a spoon. This picture doesn't show as well as I wanted just how thick the mixture becomes.  It should be somewhat like custard at this point, pretty thick.
Transfer to a bowl, cover with a sheet of plastic wrap placed directly on the custard, and chill completely.  Stir in the chilled pecans.  If you are making it into ice cream, pour into your ice cream machine as directed. Although I have never tried doing it, I would venture to say you could try freezing it without an ice cream machine and see how it goes.  Maybe try pouring just some of the chilled custard into a freezer safe container.  Let me know!

10:25 PM

Macaroni and Cheese


So the summer is over and it is time to start this blog humming again!  Tonight we had friends over for food and fellowship.  What better dish to serve on this first day of Autumn than the comfort food macaroni & cheese?  This is a bit more expensive than the traditional store bought box kind, but well worth the effort and cost.  I am sure you will agree. I doubled this recipe and it served 22 people with just enough leftovers to take   the pictures I needed.

What you need:

1 pound penne rigate
6 oz sharp cheddar cheese, shredded
4 oz Gouda cheese
4 oz Fontina cheese
1/2 cup shredded Parmesan or Asiago cheese
4 tablespoons butter
4 tablespoons flour
2 cups milk
1 teaspoon onion salt
1/4 teaspoon cayenne pepper

Heat oven to 350.  Coat a 2-quart broiler-safe  baking dish with a nonstick cooking spray.   Bring a large pot of lightly salted water to boiling.  Once the water boils, add penne.  Cook 6 minutes, then drain.


Toss together the cheeses and set aside.


Melt 4 tablespoons of butter in medium-size saucepan over medium heat.  Whisk in 4 tablespoons of flour until smooth and slightly bubbly.


In a thin stream, whisk in 2 cups of milk.  Stir in 1 teaspoons of onion salt and 1/4 teaspoon cayenne pepper.  Bring to a boil over medium-high heat.  Reduce heat and simmer 3 minutes.


Remove from heat; stir in 3 cups of the cheese mixture.


Stir the penne in the melted cheese.


Pour half the pasta in your serving dish.


Sprinkle the remaining cheese on top of the pasta.


Top the remaining pasta over the cheese.  Bake at 350 for 20 minutes.  Increase oven temperature to a broil and cook 3 minutes, until top is lightly browned. Cool slightly before serving.


Oh so yummy!

11:54 AM

Uses for Coconut


If your like me you have walked by coconut in the grocery store many times and wondered who in the world buys them.  Well now that I have some uses for them it is rare that I don't have a coconut in the house!

I posted how to make almond milk a few entries ago and the same technique is used for coconut mik.


The first thing you need to do is poke holes in the "eyes" of the coconut.  I used an object that I found in my kitchen utility drawer.  I have no idea what it is but it works.  I suppose a long clean nail would work, or perhaps an ice pick.

Next drain the water from the coconut over a bowl or measuring cup.  This step is just so that when you crack the coconut open it doesn't splash out at you.  Although the water is very good for you to drink, you don't need it for making any of the things I am going to show you.


Next, take it outside and crack it open with a hammer.  If you are doing this inside I suggest putting down newspaper and hitting it open on the floor because you need to hit it pretty hard.
After the coconut is cracked open, you need to get the meat out.  The shell comes off fairly easy, it is the inner shell that may cause some difficulties.  If you have a high powered blender or food processor it is not necessary to even take the inner shell off, in fact it is preferable to leave it on.  But if you have a regular blender you will want to take it off .  Place the meat in the blender and add 3 cups of water to it.  Part of this 3 cups can include the intial water you drained out of the coconut in the first step.
Blend it for a couple of minutes and drain it through a nut bag, or a paint strainer bag as I mentioned in the almond milk posting (April 30th).  The nut bag can be purchased for about $5 at health food stores.  A paint strainer bag can be purchased at such hardware stores as Lowes.  I got mine for $2 and it came with 2 in the package.  I supposed cheese cloth could also me used, but the bags can be used over and over again making it a more economical choice.
Squeeze the cloth and all the liquid you extract is coconut milk!  If you want to sweeten it you can add a little sugar to it, but if you use it for smoothies, I recommend leaving it plain.
Now for the pulp that is left in the bag.  I have done a couple of things with this.  First of all if you put only the white meat in the blender (getting all the inner shell off) you can use the pulp in your baking. I have added it to granola bars and chocolate chip cookies.  It just adds a hint of coconut taste but you get all the health benefits. 
If you are like me and leave the inner shell on, it makes an excellent shower scrub.  I even use it on my face and I don't have to use lotion when I get out of the shower.  The fats from the coconut is very healthy for your skin. 
And last but not least, this is how you make coconut oil.  Pour the coconut milk in a pot and simmer it until it cooks down enough to where you can drain the oil off.  This takes a long time, probably about 40 minutes or so.  You only get approximately 4 tablespoons of oil out of it.  The brown pulp that is left I have also used in my granola bars.  It is filled with healthy fat and when I put it in the granola bars I count it as 1/3 cup of butter.  I would also like to encourage you to research all the benefits of coconut.  I am sure you won't be so quick to pass one by in the grocery store anymore!

7:40 AM

Tupelo-Style Chicken

Adapted from Hard Rock Cafe's Tupelo-style chicken

If you like crunchy chicken fingers you will love the taste of these.  The recipe is a bit long, but it really isn't as time consuming as it would appear. There are many different spices in this one.  There have been times I have not had everyone of them on hand and it still turned out good.  So don't let the fact that you don't have something like cumin stop you.  The ingredient that adds the most crunchiness to it is the cornflake crumbs, I would not leave that out!  The dipping sauces are delicious and I suggest doing them ahead of time and having them on hand to have for spontaneous chicken finger snacking.  I have discovered glass baby food jars make excellent containers for storing the sauces in.

Here is everything you need for both sauces and the chicken fingers:

Honey-Mustard Dipping Sauce
1/4 cup mayonnaise
1 1/2 teaspoons yellow mustard
2 teaspoons honey
Pinch of paprika

Whisk together all the ingredients.  Set aside or refrigerate, covered, until ready to use.

Apricot Dipping Sauce
2 tablespoons deli mustard (a Dijon type works best, but plain yellow is fine also)
1 tablespoon apricot preserves
2 tablespoons honey

Whisk together all the ingredients.  Set aside or refrigerate, covered, until ready to use.

Chicken Fingers
1 cup crumbled cornflakes
2 teaspoons red pepper flakes
1 1/4 teaspoons cayenne pepper
1 teaspoon cumin
1 teaspoon salt
1/2 teaspoon paprika
1/4 teaspoon onion
Pinch of garlic powder
Oil for frying chicken (either in a deep fryer or pan frying)
1 cup milk
1 large egg, beaten
1 cup all-purpose flour
1 to 2  pounds boneless, skinless chicken breasts


To make the breading, combine all the dry ingredients, except the flour, and place in a shallow dish.

Preheat oil in either deep fryer or heavy-bottomed saucepan to 350 degrees.  If using a saucepan, coat the bottom of the pan approximately 1/4 inch on the bottom on medium-high heat.

Beat together 1 cup of milk and egg, and set in a shallow bowl.  Place the flour in a shallow dish.

Cut chicken breasts into 1/2 inch wide strips.  Coat each strip; with the flour and the egg, then coat with the flour again and egg again.

Press each strip into the cornflake mixture and carefully fry, in batches, for 4-5 minutes, until each strip is golden brown and cooked through.  Drain on paper towels.


Serve with the two dipping sauces on the side.


6:55 PM

Homemade Almond Milk

I think I could of named my blog "coolstuffmysistertellsmeandItryoutanduseandpasstheideaon toyou.blogspot.com.  The name wouldn't have been that much longer and it's true!  All joking aside, this is a recipe I was very excited to share with you.  It can be used for any nut, not just almonds.  It is less expensive than buying it and it is easy peesy to do!

This is what you need to make approximately 1 quart:

1 cup of almonds
3-4 cups of water
blender


paint strainer purchased at Lowes
It is also helpful to have a "nut bag".  You can order one online for about  $5-$10, OR pick up a paint strainer at Lowes or Home Depot for $2 for a 2 pack. This is only to remove the pulp so if you use almond milk for making smoothies you don't even have to strain the milk. 

The other thing you can use is a cheese cloth.  I prefer the "nut bag" because it is nylon and can be used over and over.  It only has to be rinsed out and you are good to go!


One recipe I looked at said you should soak the nuts in water overnight to make the nutrients in the milk more absorbable.  I was too excited to make some so I skipped this step.


The first step is to rinse the 1 cup of almonds with really hot water.  This is to make sure the almonds are free from harmful bacteria that could be on the outer shell of the nut.


Put 1 cup of almonds and 3-4 cups of water in a blender.


If you are using cheesecloth, pour the blended mixture into a cheesecloth lined colander over a bowl.


If you are using the nut bag, pour the blended milk mixture into a bowl. Line the bag in the blender and pour the milk into the bag.  This method worked so much better.  I highly recommend it.


Squeeze the bag until all the milk comes out. 


You will have about a 1/4 cup of pulp that could be used to add to other recipes such as cookie or bread dough.  I think I am going to add it to my granola bars the next time I make them.


Pour the finished milk in a container.  I happen to love glass containers.  I purchased milk from a health food store to get mine.  The $1.50 deposit on the bottle is worth it.


*Note that you can make it taste a little sweeter by adding a teaspoon of pure vanilla extract.