6:55 PM

Homemade Almond Milk

I think I could of named my blog "coolstuffmysistertellsmeandItryoutanduseandpasstheideaon toyou.blogspot.com.  The name wouldn't have been that much longer and it's true!  All joking aside, this is a recipe I was very excited to share with you.  It can be used for any nut, not just almonds.  It is less expensive than buying it and it is easy peesy to do!

This is what you need to make approximately 1 quart:

1 cup of almonds
3-4 cups of water
blender


paint strainer purchased at Lowes
It is also helpful to have a "nut bag".  You can order one online for about  $5-$10, OR pick up a paint strainer at Lowes or Home Depot for $2 for a 2 pack. This is only to remove the pulp so if you use almond milk for making smoothies you don't even have to strain the milk. 

The other thing you can use is a cheese cloth.  I prefer the "nut bag" because it is nylon and can be used over and over.  It only has to be rinsed out and you are good to go!


One recipe I looked at said you should soak the nuts in water overnight to make the nutrients in the milk more absorbable.  I was too excited to make some so I skipped this step.


The first step is to rinse the 1 cup of almonds with really hot water.  This is to make sure the almonds are free from harmful bacteria that could be on the outer shell of the nut.


Put 1 cup of almonds and 3-4 cups of water in a blender.


If you are using cheesecloth, pour the blended mixture into a cheesecloth lined colander over a bowl.


If you are using the nut bag, pour the blended milk mixture into a bowl. Line the bag in the blender and pour the milk into the bag.  This method worked so much better.  I highly recommend it.


Squeeze the bag until all the milk comes out. 


You will have about a 1/4 cup of pulp that could be used to add to other recipes such as cookie or bread dough.  I think I am going to add it to my granola bars the next time I make them.


Pour the finished milk in a container.  I happen to love glass containers.  I purchased milk from a health food store to get mine.  The $1.50 deposit on the bottle is worth it.


*Note that you can make it taste a little sweeter by adding a teaspoon of pure vanilla extract.

5:08 PM

Vanila Extract and Vanilla Sugar

I have never bought any type of hard liquor before a couple of weeks ago when I made my first batch of vanilla extract.  I felt the need to explain myself to the cashier as to why I was purchasing vodka, (like she would even care!) She caught me off guard when she asked me why I would make it when you can buy it.  My brain operates differently.  I ask myself why I would buy something if I could make it.  I didn't tell the cashier this.  I answered her question with what I felt she could more easily relate to, that being it costs much less to make your own.  She kind of looked at me like I had three heads, but I don't care.  I am excited to share this with you.

What you need:

1 cup Vodka
3 vanilla beans
jar with tight fitting lid to put it in
time (3 weeks-6 months)

Begin by slicing the vanilla bean down the middle starting one inch from the top and stopping one inch from the bottom.  Place the beans in a jar and pour the vodka over the top.  Shake it up a little. Place in a dark place.  I put my jar in a sock to make it dark.  About once a week I gently shake it up a little. 


It has been 3 weeks since I first prepared mine.  You can see the color change.  When I take the lid off I feel it needs more time.  The smell of liquor is still too strong.  The longer you wait the better.  The neat thing about this is after you have used it up all you do is pour more vodka in.  The same vanilla bean can be used for up to a year!

Some other ideas are to place 10 vanilla beans in a liter of vodka and follow the same steps.  This would be a great idea  if you wanted to make it for gifts.  I would strain it through a coffee filter and pour into 4 oz jars and put one vanilla bean back in each container.

Also it would be good to let you know that Costco sells whole vanilla beans in their baking aisle for much less than you can get it at the regular grocery store.  I have had people tell me they purchased their vanilla beans on e-bay for even cheaper than Costco.

So I had some left over vanilla beans and somewhere I read that you can make vanilla sugar by just putting a vanilla bean in the container you store your sugar in.  My friends always made fun of me because I only had my sugar in a huge container.  It would be a bit cumbersome when all you needed was a little sugar in your coffee.  Now I have this much more manageable container.  And once again the vanilla bean can be reused after the sugar is gone.  Just refill the container with sugar.  When it stops smelling like vanilla, replace the bean.

3:11 PM

Chocolate (bunny) Stack Loaf


Alice Medrich"s Chocolate Stack Loaf

I believe I have pulled out my  February issue of Better Homes and Gardens more than any other magazine in the past 4 months or so.  When I was baking for a coffee house I was always on the look out for desserts to place in the display.  This was one that I loved  so much I have repeated it many times.  I decided to post it because my magazine is falling apart and I need a place to store this recipe in a safe place. 

I used this recipe this past Easter weekend to make a bunny cake.  We had an Easter fair at church and they needed cakes for the cake walk, which was also a cake competition.  My daughter and her friends also entered a cake that I have pictured at the end of this post. Neither of us won, but I think they did a spectacular job.

You will need the following for the cake:

1 cup unbleached all-purpose flour
1 cup packed brown sugar
1/3 cup natural unsweetened cocoa powder
1/2 teaspoon baking soda
1/4 teapoon salt
1/2 cup butter, melted
2 eggs
1/2 teaspoon vanila extract
1/2 cup hot tap water

You will need the following for the fudge frosting:

3 tablespoons butter
1/2 cup sugar
1/2 cup cocoa powder
pinch of salt
1/2 cup of heavy cream
(Note: the original recipe calls for twice the amount of frosting I am telling you to use.  I think half the amount is plenty!)

Position rack in the lower third of oven.  Preheat oven to 350.  Lightly grease side of 13x9x2-inch baking pan.  Line bottom of pan wth parchment paper; set aside.

In large mixing bowl whisk together 1 cup flour, 1 cup brown sugar, 1/3 cup cocoa powder, 1/2 tsp baking soda, 1/4 tsp salt.


Add 1/2 cup cup melted butter, 2 eggs, and 1/2 tsp. vanilla.  Whisk gently until dry ingredients are moistened and mixture resembles a thick paste.  Whisk briskly about 30 strokes.  Tap or shake any batter from whisk. Use rubber spatula to sir in hot water, scraping sides as necessary, just until batter is blended and smooth.  With spatula scrape batter from bowl into prepared pan and spread to make a thin even layer.


With spatula scrape batter from bowl into prepared pan and spread to make a thin even layer.  Bake 14-16 minutes or until a wooden pick inserted into center  comes out clean.  Cool in pan on wire rack 10 minutes.  Slide a thin metal spatula or knife around cake edges to loosen from pan.  Invert cake onto rack.  Remove paper liner; carefully turn cake right side up.  Cool completely.


While the cake is in the oven make the frosting since it takes time to cool down. You may even consider making this before you make the cake.  In a medium saucepan melt 3 tbsp butter.  Stir in 1/2 cup sugar, 1/2 cup unsweetened cocoa powder and a pinch of salt.  Gradually stir in 1/2 cup heavy cream.  Heat, stirring constantly, until smooth and hot but not boiling.  Remove from heat; stir in 1 tsp pure vanilla extract.  Set aside; cool until thickened and spreadable.  To cool quickly, loosely cover and refrigerate 1 hour.  Store up to 1 week in refrigerator.


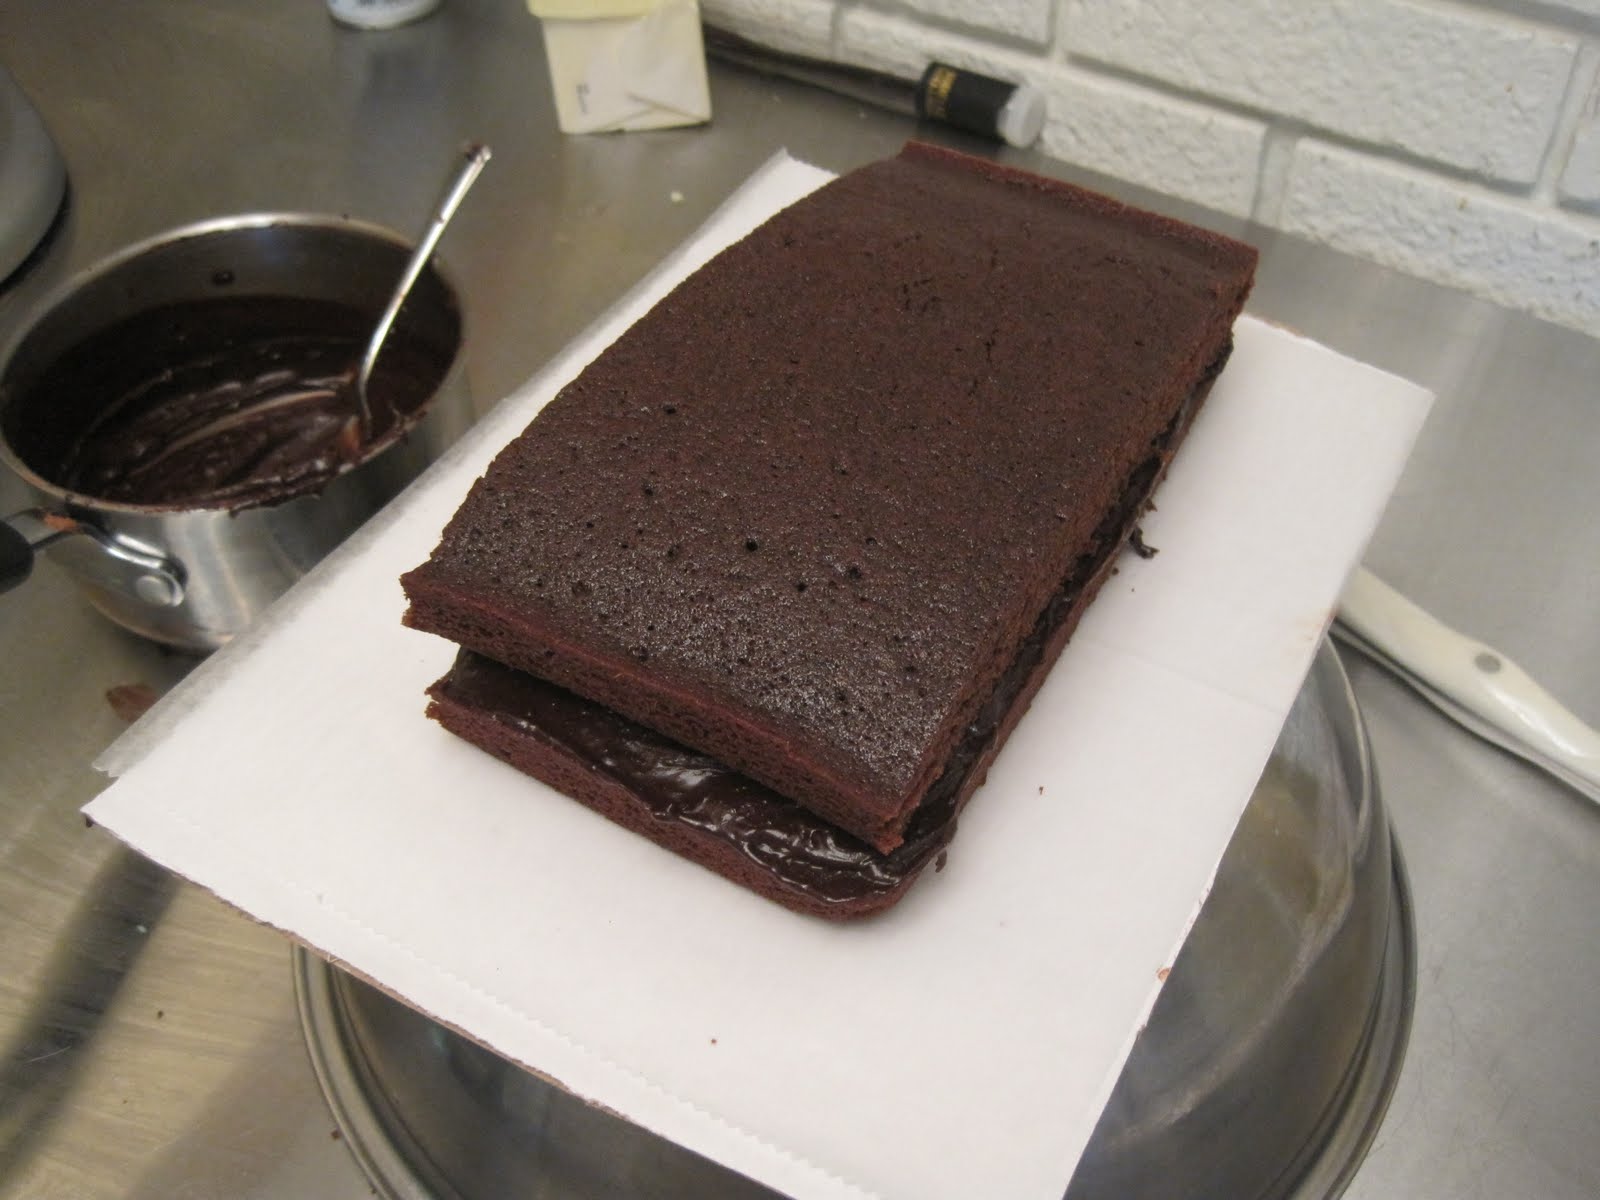
Cut cake crosswise in three equal rectangles.  Thickly spread frosting on one piece, top with a second piece and spread with frosting.  Continue with frosting the sides. I put my cake on a piece of cardboard on the bowl turned upsidedown to make it easier to frost.


I transformed my into a bunny by having my artistic oldest daughter draw a bunny face for me on a piece of cardboard.  I cut it out and leaned it againt the cake.  I used colored coconut for grass.


And as promised to my daughters and her friends, the cake they entered in the contest.  I think you will agree they did a great job. Their homemade buttercream frosting was out of this world! I give them honorable mention! (They should have won if you ask me!)


4:54 AM

Scattering Seed

Photo by Brooke

"And the seeds that fell on the good soil represent honest, good-hearted people who hear God's word, cling to it, and patiently produce a huge harvest." -Luke 8:15

12:05 PM

Best Ever Fresh Salsa


I served this meal a few nights ago and it was something everyone enjoyed.  I thought I would share with you the salsa part of the meal because that is what really made it so good.  For my dinner, I made flour tortillas (posted on January 26, 2010 ) and topped it with breaded chicken fingers and homemade sour cream (posted on June 14, 2010) and then added lettuce and the salsa.  I am sure you will find other ways to use this most delicious salsa.

The recipe comes from my relatives who once lived in Southern California.   If you are someone who perfers fresh salsa over canned salsa, this recipe will not disappoint.  I did process a few jars this past fall by using the tomatoes from my garden.  I had to blanch the tomatoes first to remove the skins.  It turned out pretty good, but not as good as the fresh.

What you will need:

2 tomatoes
2 tablespoons chopped red onion
3 tablespoons chopped celery
3 tablespoons green pepper
2 whole chopped green onion
2 tablespoons diced green chile pepper (I used 1/2 of a 7 oz can)
1/2 teaspoon mustard seed
1 tablespoon red wine vinegar
1 tablespoon chopped cilantra 
1/2 teaspoon each of salt and pepper
2 tablespoons oil

Just mix all the ingredients and your done!  Putting it in the refrigerator about an hour before you serve it makes it slightly better, but isn't necessary.  If you like it hotter, add more green chile peppers.  Or if you like it milder, omit the chile peppers.  I also had some red and orange pepper that I added to mine.  It yields approximately 1 quart.

7:35 PM

A Page from my Journal...Glorify God

Photo by Katelyn 


I declare Your glory all day long.

-Psalm 71:8

How can I glorify God in everything?  The Laurie Cole study that I am doing right now, "The Temple" had an excellent answer to this question.  Simply put, I glorify God when I make Him look good in everything I do or say.  A simple explanation to a way of living that takes a lifetime of learning.  Thank goodness for what Jesus did!  By coming to earth, dying on the cross, and rising again I have forgiveness for all the times I fall short of declaring His glory.


5:09 PM

Microwave Popcorn

This white fluffy snack has a tender spot in my heart for many reasons.  We used to have popcorn competitions up North at our families cottage with my relatives cabin next door.  Of coarse my Uncle Bob was clearly the winner every time with his perfect application of salt to butter ratio! Thanks to my aunt and uncle, who  would make popcorn for us after we got done swimming at their house,  to this day I cannot go swimming without craving popcorn afterward.  My Aunt, Uncle and Cousin moved to popcorn country, Minnesota, years ago and bring it back to Michigan in a 50 pound bag to divide amongst us when they come for a visit.

 Another sweet memory of popcorn I have (and anyone reading this that is a cousin or sibling of mine) would certainly have sweet memories of Grandma in her pink robe standing over the stove top making Jiffy popcorn.  We would stand in amazement as the flashy foil expanded nearly 7 or 8 inches high!

Growing up I remember the green popcorn maker that we had.  My mom would pull it out often and serve it with kool-aid to have as a snack while we watched a movie together.

Or how about all the times we went to the show growing up with someone carrying a huge purse to conceal the bags of popcorn we popped at home.  I felt so sneaky and it was fun!  I haven't done this since one of my children questioned the dishonesty of it.  Leave it to an honest child to convict me!

Since the modern convenience of microwave popcorn has made it's way on the scene, most people never use the stove and a pot to make their popcorn.  I can't tell you how many people have commented on my popcorn making ways when they come over to watch a movie together.  Most people these days never use a stove or a popcorn maker (and I'm not talking about an air-popper that creates a snack that is just a little better than nibbling cardboard!)  While I am totally in favor of white popcorn made in a pot on the stove, or in my "Stir Crazy" machine, I have found a most convenientinexpensive, healthy way to make it.

I can appreciate the need for convenience so you might want to try this. If you have a microwave, a paper lunch bag, a teaspoon of oil (any kind will do), and of course popcorn, you have everything you need.

All you do is pour 1/4 cup of popcorn kernels in the bottom of a paper bag and pour 1 teaspoon of oil on top.  Fold the bag over a couple of times on top so the popcorn doesn't come out and put in the microwave for approximately 1 1/2 minutes.  Any unpopped kernels can go back into the microwave in the same bag.  You can further flavor it after it is done.  That's it, pretty basic.  It yields the amount shown in the picture.